Tuotehaku

Ruutunäkymän liikennevaloissa vihreä on heti saatavilla, punainen juuri nyt loppu varastosta, keltainen ei vielä ilmestynyt tai huutomerkin kera ei hyllyvalikoimaa, eli me tilaamme sitten, kun sinä olet tilannut meiltä. Saatavuusinfossa kerrotaan tarkemmin saatavuustiedoista.

Haun tulokset 1 - 24 / 79


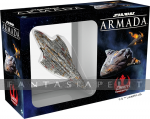
Star Wars Armada: Chimaera Expansion Pack

Grand Admiral Thrawn arrives to the battles of Star Wars: Armada in the Chimaera Expansion Pack!

In addition to the new Grand Admiral Thrawn commander card, the Chimaera Expansion Pack introduces a new Imperial Star Destroyer, adorned with Thrawn's stylized chimaera, two Mandalorian Gauntlet squadrons, six ship cards, two squadron cards, and seventeen other upgrade cards.

The first thing you might notice about the new Star Destroyer from the Chimaera Expansion Pack is that it looks different from that in the Imperial-class Star Destroyer Expansion Pack. This is thanks to its distinctive chimaera design. But the physical, aesthetic differences between the two miniatures only begin to hint at the differences in the strengths that they bring to your fleet.

Where the Imperial-class Star Destroyer Expansion Pack gives the Imperial I-class Star Destroyer and the Imperial II-class Star Destroyer , the Chimaera Expansion Pack gives us three copies each of two different refits, the Imperial Star Destroyer Kuat Refit and the Imperial Star Destroyer Cymoon 1 Refit .

Both these Star Destroyer refits feature new upgrade bars that may lead to significant changes in the way you fly your fleet. Maybe you'll only make a minor tactical adjustment. Maybe you'll adjust your entire strategy to accommodate the Cymoon 1 Refit's ability to equip any of the expansion's three Fleet Command upgrades. Maybe you won't even take advantage of the new upgrade potential, but simply by gaining the option, you place yourself in a better position to respond to your foes' tactics, and make it harder for them to anticipate yours.

• An Imperial faction starship expansion for the Star Wars: Armada miniatures game
• Marks the introduction of Grand Admiral Thrawn as a new Imperial commander
• Comes with one Imperial Star Destroyer pre-painted in the scheme of Thrawn’s Chimaera
• Includes two Mandalorian Gauntlet squadrons
• Six ship cards and eighteen upgrades permit a wide range of new strategies

      heti saatavilla
78.30 €
Star Wars Armada: Core Set

Katso pelin traileri valmistajan Youtube -sivuilta.

A two-player miniatures game of epic fleet battles in the Star Wars galaxy!

Massive Star Destroyers fly to battle against Rebel corvettes and frigates. Banks of turbolasers unleash torrential volleys of fire against squadrons of X-wings and TIEs. Engineering teams race to route additional power to failing shields. Laser blasts and explosions flare across the battlefield. Even a single ship can change the tide of battle.

In Star Wars: Armada, you assume the role of fleet admiral, serving with either the Imperial Navy or Rebel Alliance. You assemble your fleet and engage the enemy. Using the game’s unique maneuver tool, you steer your capital ships across the battlefield, even while squadrons of starfighters buzz around them. Then, as these ships exchange fire, it’s your job to issue the tactical commands that will decide the course of battle and, perhaps, the fate of the galaxy.

The Star Wars: Armada Core Set contains everything you need to get started, including the rules, an articulated maneuver tool, a range ruler, six command dials, nine attack dice, ten unpainted squadrons, and three pre-painted ship miniatures (Victory-class Star Destroyer, Nebulon-B frigate, CR90 Corellian corvette), plus more than 130 cards and tokens. All you need to engage the enemy and battle for the fate of the galaxy!

Space Battles on a Galactic Scale
Winning a battle between capital starships requires more than raw firepower. It requires the coordinated activity of hundreds – even thousands – of crew. As a ship’s commanders belt out orders, gunners rain fire upon enemy ships, and engineering teams race to keep their ship’s shields and hull intact, often rerouting power where it’s needed most.

Armada allows you to bring one or more of these massive ships to battle, along with whole squadrons of starfighters. To win, you must issue commands, direct your fleet’s movement, coordinate its fire, sustain its defenses, and do all of this while remaining mindful of your battle objective.

More than that, you’ll need to master every aspect of the ships in your fleet. You need to become intimately familiar with your ship’s design, its firing arcs, its attacks and defenses, and the way that it uses the game’s unique maneuver tool to set its course.

This maneuver tool is one of the game’s most innovative features and adds a unique feel to the way your capital ships must accommodate for inertia as they maneuver through the stars.

Capital ships can’t easily vary their speeds or execute hairpin turns like the starfighters that buzz around them. Accordingly, you only use the maneuver tool to maneuver your capital ships. Then, even as it makes it easy for you to set a ship’s course, the game’s maneuver tool lends an element of realism to its pitch and yaw.

As an example of how Armada uses its maneuver tool to realistically portray the different ways its capital ships can maneuver, we can consider the differences between the CR90 and the Victory-class Star Destroyer.

The CR90 is both capable of tighter turns and faster, with a maximum speed of "4" versus the Star Destroyer's maximum speed of "2." At speed "2," while the Star Destroyer can adjust the maneuver tool only one click at the second joint, the CR90 can adjust its course one click at the first join and two clicks at the second. Still, the faster the CR90 flies, the fewer clicks it can adjust its course through the initial range increments.

Another important consideration is that capital ships in Star Wars: Armada fire before they move, so when you set your ship’s course, you’re always trying to set yourself up for a good shot in the next round. However, the more powerful your ship, the less nimble it is, and the harder it is to adjust your actions on the fly.

Altogether, the maneuver tool and the rules for ship movement work in tandem to force you to always look ahead. Successful fleet admirals excel at planning their attack strategies well in advance of their initial engagements.

Capital Ships in Combat
Armada balances the awesome scale of the Star Wars galaxy’s ships and space warfare with intuitive ship designs and accessible rules for issuing commands and resolving combat that make for rich, engaging, and highly tactical play experiences.

Capital ships are extremely powerful war machines, but they’re also massive and sophisticated vessels that can’t swiftly react to every development in the heat of battle. Accordingly, the key to flying these vessels effectively is learning how to plan ahead. You want to issue your commands in such a way that your crews will be ready to execute them at just the right times.

Each of your pre-painted capital ships has a command value, which determines how many commands it will have in its stack at any given point in time. During setup, you secretly build your initial command stack, selecting from any of four different commands, each of which provides a different advantage. Once you have locked your selections, you place the commands in your stack in the order of your choice. Then, during each round of game play, you secretly select and assign a new command to your ship, placing it at the bottom of your command stack, before you reveal the command at the top of your stack and gain its benefits.

You might launch a screen of TIEs to intercept incoming X-wings. You might concentrate your fire on an incoming capital ship. You might scramble to repair your shields. Or if you reveal a command that doesn’t offer an immediate benefit, you can place a token on your ship and save a lesser version of that command’s benefits for later use.

Notably, the larger and more powerful your ship, the less quickly it can react to your commands. Most of the more powerful ships, like the Victory-class Star Destroyer, feature higher command values that force you to plan your actions two or more rounds ahead of time. In this way, the command stack doesn't just reflect the various actions your ships can take; it also reflects how swiftly they can adjust to the changing tides of battle.

After your ship resolves its command, it can perform up to two attacks. These can be directed against the same target or against different targets. However, these attacks must originate from two different hull sections and can only target ships or squadrons within range of those hull sections’ firing arcs.

The number and type of dice you roll for your attacks depend upon the ship, the hull section from which its attack originates, and the range of the attack.

Meanwhile, each ship offers a number of defenses from enemy fire. Each ship’s hull is reinforced to withstand enemy fire, though larger ships like the Victory-class Star Destroyer can withstand much more than smaller ships like the Corellian corvette. Meanwhile, each section of your ship’s hull has a shield rating, indicating how many hits its shields can absorb before enemy fire damages the hull directly. Moreover, in the heat of battle, you need to decide when and how to make use of your ship’s defense tokens. With these, you can angle your deflector shields and perform evasive maneuvers to reduce the amount of damage your ship suffers.

Squadrons of Starfighters
Although Star Wars: Armada is built around the galaxy’s many capital ships, you’ll almost certainly want to fly one or more squadrons of starfighters in your fleet, both to threaten enemy ships and to defend your ships from enemy squadrons.

An X-wing squadron is shown connected to its base which tracks its remaining hit points (shown here at "5") and whether or not it has activated. Here, the blue tab on the left of the base indicates that the squadron has not yet activated. Once the squadron has activated, the tab is pushed through to the other side and displays its orange end.

Your squadrons are highly adaptable and flexible collections of starfighters, and only a foolish fleet admiral would overlook the tactical options that they can bring to a battle. While squadrons don’t pack the raw power or resilience of the capital ships they accompany, they come with their own rules for movement and combat that make them far more capable of occupying and threatening the exact portion of the battlefield that you choose.

If left unchecked, a swarm of starfighters can tear down even the most massive of capital ships, and while capital ships can return their fire, any shot directed at squadrons is a shot not taken at a larger ship. Furthermore, capital ships don’t use their primary weapons while attacking squadrons; they have to use their anti-squadron armament, which is typically much less effective.

Add to this the fact that some squadrons are led by such skilled pilots as Luke Skywalker, who can bypass a capital ship’s shields when he attacks, and you’ll find that squadrons are far more than an afterthought. They’re powerful weapons that skilled fleet admirals will be able to integrate into their larger strategies.

Meanwhile, even though the squadrons in Armada aren't pre-painted like the capital ships, they are presented in colors intended to complement their fleets.

Winning the Battle to Win the War
In addition to its ships and squadrons, Armada shapes your Star Wars battles with twelve different objective cards. Each game uses one of these objectives, which introduces special rules and helps to define the narrative of your battle. Are you tracking down a specific target? Are you contesting a key outpost? Are you trying to intercept key intel?

Importantly, the game’s objectives change the ways that you’ll score points in each battle, and they force you and your opponent to adapt your strategies, leading to tremendous replayability.

Executing Your Battle Plan
Games of Armada are played over six rounds, each of which is broken into four phases.

1) Command Phase
In the Command Phase, you and your opponent secretly assign commands to each of your ships. These are locked into that ship’s command dials and are placed facedown at the bottom of its command stack.

You can choose from any of four basic commands, each of which offers distinct advantages:
* The navigate command allows you to change your ship’s speed and increase its maneuverability.
* The squadron command allows you to order nearby squadrons to move and attack early.
* The repair command allows you to recover shields and repair your hull.
* The concentrate fire command allows you to increase the power of a single attack.

Importantly, each ship has a command value that indicates how many commands it will have facedown in its command stack at the beginning of the round. This means that, in the game's setup, before you have yet engaged the enemy, you need to issue commands for your first round or rounds of combat. Then, each Command Phase, you continue planning further ahead, reacting to the shape of battle, but issuing commands that you intend to have your crews execute one or more rounds later. Moreover, the more powerful your ship, the less quickly it can react to your commands. Most of the more powerful ships, like the Victory-class Star Destroyer, feature higher command values that demand you plan your actions two or more rounds ahead of time.

Once you and your opponents have assigned new commands to each of your ships, you proceed to the Ship Phase.

2) Ship Phase
In the Ship Phase, you and your opponent take turns activating your ships, starting with the player who has initiative for the round. When you activate a ship, you first reveal its command for the round. You can either trigger the command’s effect from the dial for full effect, or you can store the command for future use, placing a token upon your ship’s card, and reserving the command’s effect for a more opportune moment, albeit at a reduced effect.

After you resolve a ship’s command, your ship can perform up to two attacks, though each attack must originate from a different firing arc. Each attack can target a single eligible ship, or it can target every fighter squadron within range of your firing arc. Attacks made against enemy ships use the type and number of dice indicated on the section from which they originate. Attacks made against enemy squadrons use the type and number of dice indicated by the Anti-Squadron section of your ship’s card.

Notably, while you must fire both of your attacks from different sections, if a single enemy ship lies within range and line of sight of both firing arcs, you can perform both attacks against that ship.

After your ship fires, it must set its course and move. You establish your ship’s initial speed during setup, and you must continue to move at that speed until you reveal a navigate command. Your speed determines both how far you can move and how many times you can click the game's maneuver tool to adjust your course at each speed increment.

This maneuver tool is one of the game’s most innovative features and adds a unique feel to the way your capital ships must accommodate for inertia as they maneuver through the stars.

3) Squadron Phase
Although Star Wars: Armada is built around the galaxy’s many capital ships, you’ll almost certainly want to fly one or more squadrons of starfighters in your fleet, both to threaten enemy ships and to defend your ships from enemy squadrons. If left unchecked, a swarm of starfighters can quickly tear down even the largest capital ship, and though capital ships can exchange fire with the starfighters that harry them, any shot directed at a squadron is a shot not taken at a larger ship.

In the Squadron Phase, you and your opponent take turns activating any unactivated squadrons, beginning with the player who has initiative. When you activate a squadron, you can move it or perform an attack with it.

Squadrons have 360-degree firing arcs, so a swarm of fighters can quickly menace even the greatest capital ships. Accordingly, every good fleet admiral needs to develop a plan for dealing with these fighters. You don’t want to reduce the amount of firepower that you unleash at your enemy’s larger ships, but you can’t afford to allow enemy fighters to attack you at their leisure. As a result, then, most fleets protect their ships by using screens of fighters to engage enemy squadrons.

Meanwhile, even though the squadrons in Armada aren't pre-painted like the capital ships, they are presented in colors intended to complement their fleets.

4) Status Phase
In the Status Phase, players ready their exhausted defense cards and flip the initiative token. Then the player with initiative increases the round count, or if you’ve just completed the sixth round, the game ends. Victory is awarded to the player who has scored more total points, counting both those awarded for eliminating enemy ships and squadrons as well as those awarded for completing objectives worth victory points.

Fighting for the Cause
Your Armada battles aren’t meaningless confrontations. You’re fighting them to make progress within the Galactic Civil War. You’re waging battles over key tactical concerns. The fate of the galaxy is at stake.

With twelve familiar objectives, Armada defines your confrontations and immerses you more fully in its Star Wars experience. At the beginning of each game, you and your opponent will select one of these objectives, which introduces special rules and helps to define the narrative of your battle. Are you tracking down a specific target? Are you contesting a key outpost? Are you trying to intercept key intel?

Importantly, the game’s objectives change the ways that you’ll score points in your game, and they force you and your opponents to adapt your strategies, leading to tremendous replayability.

Assemble Your Fleet
With its capital ships, starfighter squadrons, and accessible rules, Star Wars: Armada provides you an unparalleled take on the largest and most consequential battles in the Star Wars universe. What’s more, your first games are only the beginning of your involvement in the Galactic Civil War.

Just as it is your job as fleet admiral to assemble a battle plan, it is your job to build the fleet that stands the best chance of emerging from battle victorious. Rules for fleet-building allow you to handpick your strike force as you prepare to meet the enemy. Not only can you choose which ships and squadrons to bring to battle, you can upgrade them with powerful weaponry or call upon the talents of elite pilots and officers.

As Rebel and Imperial fleets collide, thousands of crew will heroically perform their duties, thousands more will die, but you are the one whose decisions will determine the course of the battle and help decide the fate of the galaxy.

Command your fleet, win the battle, and play your part in the Galactic Civil War!

• A two-player miniatures game of tactical fleet battles in the Star Wars universe
• Core Set contains includes three pre-painted capital ship miniatures, ten unpainted fighter squadrons, and more than 130 cards and tokens
• Ships utilize a unique, articulated maneuver tool to quickly set their courses
• Rules for stacked commands force players to strategize multiple turns ahead, even as they make difficult tactical decisions in the heat of battle
• Command the unmat

      heti saatavilla
156.70 €
Star Wars Armada: Corellian Conflict Campaign Expansion

An epic Star Wars: Armada campaign expansion for two to six players!

The Galactic Civil War was not won in a single battle. The epic conflict at the heart of Star Wars saw countless skirmishes, waged in hundreds of systems and over thousands of planets. Even the ancient Core Worlds were touched by the spark of rebellion.

Soon, with The Corellian Conflict, you and your friends will be able to wage strategic battles for key hyperlane routes, seize vital shipyards, establish new bases, and decide the fate of the Corellian Sector. Working as teams, you will take sides with the Galactic Empire or Rebel Alliance, then meet your foes in battle for control of vital worlds. New campaign rules guarantee that your battles have long-term consequences, and the experience you gain from your victories may prove invaluable toward the success of your overall campaign.

Finally, The Corellian Conflict introduces new objectives and squadron cards for use both in your campaign and in standard play. The expansion's twelve objectives introduce new challenges and paths to victory. And its sixteen new squadron cards add greater variety to the squadrons from your Core Set, Rebel Fighter Squadrons Expansion Pack, and Imperial Fighter Squadrons Pack, allowing you to field them as some of the most legendary pilots and squadrons from the Galactic Civil War!

Your Path to Victory
The dramatic events of The Corellian Conflict and your struggles for the Corellian Sector play out over multiple campaign turns during which you and your teammates meet your foes in games of Armada, or battles. These are fought at any of the twenty-five different strategic locations depicted on the expansion's map, and the results of these battles carry forward, reshaping the sector and your position within the campaign.

You may suffer damage to your ships, leaving them weaker for ensuing battles. You may gain resources with which you can repair your ships or add to their upgrades. You may even be able to add new ships to your fleet. At the same time, your unique squadrons and the crews of well-captained ships may gain veteran status, making them more effective in future combats. Or the damage they suffer may leave them scarred. It is even possible for them to meet their demise, and all those unique ships, squadrons, or crew who do fall in battle are removed from the remainder of the campaign.

Of course, you need to pay attention to the impact your battle will have on your fleet, but it is the success or failure of your bid for the Corellian Sector, itself, that will ultimately matter most. To this end, no matter whether you play as Rebel or Imperial, you need to mind the strategic importance of all the sector's twenty-five battlegrounds, and you need to determine the best time to make your play for any of them. These different planets, stations, and asteroid belts are worth varying numbers of campaign points when you assault one and destroy your opponent's base or outpost. Moreover, many of these locations offer advantages in the terms of strategic effects that you gain while you control them.

For example, the Repair Yards at Nubia allow you to more swiftly and effectively repair your damaged ships, and the Spynet at Raider's Point provides you a token that you can spend to redeploy one of your ships or two of your squadrons after your opponent has finished deploying his fleet.

In the end, a team wins control of the Corellian Sector when it scores a set number of campaign points based on the number of players, and because each team can only score a couple of campaign points each round, The Corellian Conflict guarantees you a thrilling series of battles that mount in tension as they build toward the final campaign points… or as your opponents risk everything in a desperate gamble, throwing the remainder of their fleets at you in a one, climactic All-Out Offensive.

New Squadrons and Objectives
Even as The Corellian Conflict introduces a dynamic new campaign option to your games of Star Wars: Armada, it adds greater variety and tactical depth to your standard games with twelve new objectives and sixteen new squadron cards.

The objectives in Armada lend shape to each of your battles, ensuring that each is layered with strategy. While you can win games by destroying your opponent's entire fleet, it is often difficult to do so. Star Destroyers and Mon Calamari cruisers often prove too resilient to fall. This means that victory often goes to the player who did the best job of pursuing the strategic goals set forth by the game's objective card, and it becomes vital to balance your attention between the game's ship-to-ship combats and your pursuit of valuable objective points.

And with The Corellian Conflict, balancing these matters becomes even more vital, more dynamic, and more challenging. Not only do you double your possible options, allowing you to tailor your fleet-building more closely to your objectives, but you find a greater variety between the different challenges these objectives create—not just in how you can pursue them, but also in how much each one might be worth.

You can strip the Station advantages for your opponent and double them for yourself with Station Assault, you can protect your fleet of small-base ships with a Jamming Barrier, or you can race through the game's obstacles—including the new dust field obstacles—in order to get to the middle of the table and complete your Salvage Run ahead of your opponent. Whichever set of objectives you choose, they do more than simply force you to adopt new tactics; they permit you to pursue new strategies with your fleet, and they create whole new narratives over the course of your games.

Meanwhile, the sixteen unique squadron cards in The Corellian Conflict add greater utility to the squadrons from your Core Set, Rebel Fighter Squadrons Expansion Pack, and Imperial Fighter Squadrons Pack.

These include some of the most storied pilots and legendary squadrons in the Star Wars universe, meaning that for the first time, The Corellian Conflict allows you to fly Biggs Darklighter alongside Luke Skywalker in Armada. You will also find Rogue Squadron, Black Squadron, and the new Imperial interceptor ace, Ciena Ree, who hails from Claudia Gray's recent Star Wars novel, Lost Stars.

Best yet, because all these squadrons and objectives are all fully tournament-legal, they are destined to impact all your games, not just those in The Corellian Conflict!

The Corellian Sector Awaits You
Explore a new sector and whole new dimensions in your games of Armada. Work with your teammates. Aim for new objectives. Command some of the most storied and talented squadrons in the Star Wars galaxy. And coordinate the strategy of your battles to win the larger war.

• A campaign expansion for the acclaimed Star Wars: Armada miniatures game
• Two to six players vie for control of the Corellian Sector
• Campaign rules, locations, and objectives add new strategic concerns to your Armada battles
• Sixteen squadron cards permit new uses for many existing fighter squadrons
• Introduces the possibility of a massive, climactic All-Out Offensive with more than 2000 fleet points on the table!

      heti saatavilla
46.50 €
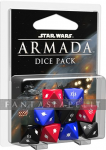
Star Wars Armada: Dice Pack

Don’t wait until it’s too late to intensify your firepower.

The enemy fleet approaches firing range. Squadrons of starfighters race into position. Star Destroyers, corvettes, and frigates raise their shields and ready their weapons. The massive battles of Star Wars: Armada are soon to begin.

As you prepare for the upcoming conflict, you’ll want to make sure your strategy is sound, your ships are in good repair, and you have all the ammunition you need. With the Star Wars: Armada Dice Pack, you can better concentrate your fire, raining destruction upon your foes.

Plan for Every Contingency
In Armada, you need to learn how to plan ahead. Capital ships are massive war machines that measure hundreds of meters long and can boast crews that number in the thousands. They can’t dart nimbly about the battlefield like the starfighters that accompany them, and successful fleet admirals need to adjust their plans to the realities of their ships.

Even so, one of the best ways to ensure that your strategy meets as few impediments as possible is to plan for every possible contingency. While you’re commanding multiple capital ships and directing numerous starfighter squadrons, you don’t need additional surprises or distractions.

The nine custom dice in the Armada Dice Pack ensure that you’ll be ready for every eventuality. With its three blue, three black, and three red attack dice, you’ll focus less on rolling and more on finding the best possible shot.

Fully Armed and Operational
As your gunners take their stations, make sure your turbolaser batteries and your quad laser cannons are fully armed. With the Star Wars: Armada Dice Pack, you’ll have all the firepower you need to defeat any foe.

• Features a second set of nine Armada attack dice
• Streamlines gameplay, allowing you to focus on the battle at hand
• Easily replace dice lost from the Star Wars: Armada Core Set

      heti saatavilla
14.40 €
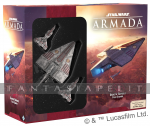
Star Wars Armada: Galactic Republic Fleet

War! The threat of the Separatist Alliance is spreading, leaving plundered worlds and petty tyrants in its wake. To counter this menace, the Galactic Republic has mobilized its fleets, meeting the Separatists in epic clashes among the stars. Guided by the ideals of the Republic, the ancient Jedi Order and legions of clone troopers manning these ships fight to bring a swift end to the chaos of the Clone Wars and restore peace to the galaxy.

Featuring three highly-detailed, pre-painted capital ships, two commanders, and 12 starfighter squadrons between them, these expansions include everything you need to begin building your Galactic Republic fleet and play out the battles that will decide the fate of the Star Wars galaxy. Additionally, players will also find all the essential components needed for one player to learn the game, making this the perfect entry point for new players or veterans looking to experiment with new ships.

Galactic Republic Fleet Starter
As great armadas clash in battles across many systems, the final fate of the Galactic Republic will be decided by massive capital ships and the vast number of starfighters they unleash. Legendary Jedi Knights led these fleets and their elite clone forces against the Separatist menace. The Galactic Republic Fleet Starter is your entry point to the epic space battles of the Clone Wars.

This set lays the foundation for your Republic fleets by putting you in command of a mighty Acclamator-class Assault ship and two powerful Consular-class Cruiser miniatures. Each of these ships can be deployed in one of two variants, giving you the freedom to fine-tune your fleet’s firepower. Though these ships are often outnumbered by seemingly endless Separatist fleets crewed by battle droids, they are never outmatched. Twenty upgrade cards see champions of the Republic like Bail Organa step forward to boost your fleets while the crews of ships like the Implacable are ready to sacrifice themselves for others.

Meanwhile, four squadrons of brave clone troopers launch into battle in the V-19 Torrent, ready to defend the fleet from swarms of Separatist droid fighters. Ideal light escorts, two squadron cards give you the freedom field a generic squad of V-19s or use the skills of elite Blue Squadron pilot “Axe.”

No matter how you decide to outfit your fleet, the Galactic Republic Fleet Starter is an excellent place to begin your Star Wars: Armada journey. You’ll find all the components necessary to begin playing within this set, including nine attack dice, 10 command dials, eight speed dials, 12 objective cards, six obstacle tokens, a range ruler, and a maneuver tool.

      heti saatavilla
130.60 €
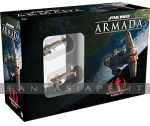
Star Wars Armada: Hammerhead Corvettes Expansion Pack

Named for its distinctive silhouette, the Hammerhead corvette features a durable design that has kept the ship relevant for centuries. While the Hammerhead is officially classed as a transport, its potent engines, sturdy frame, and heavy armament also serve it well in combat. Often fielded in groups by the Rebellion, Hammerheads are agile and responsive enough to lend themselves to formation tactics and mutual support roles within a larger fleet.

You'll be able to explore some of these formation tactics in Armada with even just one Hammerhead Corvettes Expansion Pack. Along with its two pairs of ship cards and a full complement of fourteen upgrade cards, the expansion introduces two pre-painted, small-base Hammerhead corvette miniatures.

Just like the Quasar Fire-class cruiser-carrier, these ships can use their dual-slotted Weapons Team / Offensive Retrofit upgrades to punch above their weight. And as you might expect from a ship that Rogue One featured in a head-on collision with a Star Destroyer, the Hammerhead corvette fits perfectly into a no-holds-barred, frontal assault. Its forward battery armament of three dice can be bolstered at close range with the missiles from its External Racks, and then if your Hammerhead bears the Garel's Honor Title upgrade, it can deal a faceup damage when it slams into its enemy.

Given how crippling the critical hits in Armada can be, the Garel's Honor may quickly become one of your most-feared small-base ships, especially if it can flip additional damage cards faceup through the efforts of your Boarding Engineers.

• A Rebel starship expansion pack for the popular Star Wars: Armada miniatures game
• Features two pre-painted, small-base Hammerhead corvette miniatures
• Two ship cards and fourteen upgrades permit a new focus on closerange combat
• Offers clever fleet admirals access to new formation tactics
• Comes with all the dials, plastic, and tokens needed to bring the Hammerhead corvettes to battle

      heti saatavilla
62.70 €
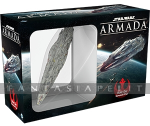
Star Wars Armada: Home One Expansion Pack

Admiral Ackbar and his flagship star cruiser, Home One, arrive to Armada in the Home One Expansion Pack. Featuring one large-size, pre-painted miniature MC80 star cruiser, two ship cards, three command dials, and fourteen upgrades, the Home One Expansion Pack gives the Rebel Alliance a ship that can trade blow for blow with nearly any Imperial vessel.

You’ll find one large-size, pre-painted miniature MC80 star cruiser, two ship cards, three command dials, and fourteen upgrades. Altogether, the Home One Expansion Pack gives the Rebel Alliance a ship that boasts battery armaments of six dice from both its left and right hull zones, making it capable of trading blow for blow with nearly any Imperial vessel. Empower a whole new set of tactics in your battles for galactic freedom!

Boasting battery armaments of six dice from both its left and right hull zones, the MC80 star cruiser is as hard-hitting as a Victory-class Star Destroyer and the Rebellion's best answer to the Imperial-class Star Destroyer. Better yet, this Mon Calamari starship is even more powerful when flown under the command of Admiral Ackbar, who can add two red attack dice to any attack made by a starship that fires only from its left and right hull zones during its activation.

Will you race your star cruiser boldly down the middle of the Imperial fleet, firing at enemy ships on both sides? Will you dare your opponent to allow you the use of the Advanced Gunnery objective? Or will you circle the Imperial fleet at a distance, taking shots from a battery armament enhanced by Admiral Ackbar, Slaved Turrets, and the Defiance title? No matter how you bring it to battle, the MC80 star cruiser gives you the muscle to employ a whole new set of tactics in your battles for galactic freedom.

• A Rebel starship expansion for the Star Wars: Armada miniatures game
• Features one large-base, pre-painted Home One-class MC80 star cruiser miniature
• Lead your Rebel fleet with Admiral Ackbar and the Home One
• Adds unprecedented firepower and resilience to your Rebel fleet
• Includes fourteen upgrades, plus all requisite command dials and tokens

      heti saatavilla
62.00 €
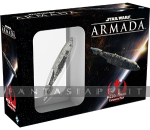
Star Wars Armada: Imperial Class Star Destroyer Expansion Pack

At the height of the Galactic Civil War, the Imperial-class Star Destroyer was the commanding cornerstone of the Imperial Navy. Measuring 1,600 meters in length, a single Imperial-class Star Destroyer would boast a crew of more than 37,000 and carried a standard complement of four TIE fighter squadrons, one TIE interceptor squadron, and one squadron of TIE bombers. It could also carry an entire legion of stormtroopers, along with AT-ATs, AT-STs, and other landing craft. Most importantly, each Imperial-class Star Destroyer sported armament powerful enough to bring wayward systems to heel under Imperial control.

The Imperial-class Star Destroyer Expansion Pack brings this behemoth battleship to your games of Armada with one pre-painted miniature, two ship cards, three command dials, eighteen upgrades, and all requisite tokens.

Moreover, even as it affords you the opportunities to snare your foes with a tractor beam and fly your fleet to battle under the command of Darth Vader, the Imperial-class Star Destroyer Expansion Pack introduces a new type of defense token to your Imperial fleet: the Contain defense token. Featured on both the Imperial I-class and Imperial II-class Star Destroyers, the Contain token can cancel the standard critical effect of a shot that passes through your shields to your hull. Given the devastating nature of many of the critical effects in the Armada damage deck, the Contain token is a valuable tool that you'll want to spend wisely as you use your Star Destroyers to spread fear throughout the galaxy.

• An Imperial starship expansion for the Star Wars: Armada miniatures game
• Features one large-base, pre-painted Imperial-class Star Destroyer miniature
• Field your Star Destroyer in battle as either an Imperial I- or Imperial II-class Star Destroyer
• Eighteen upgrades include the new commander version of Darth Vader
• Comes with all the dials and tokens you need to fly your Star Destroyer to battle

      heti saatavilla
75.60 €
Star Wars Armada: Imperial Fighter Squadrons II Expansion Pack

The Empire's response to the continued spread of rebellion is the development of wildly advanced new fighters and the tactics their squadrons permit.

The Imperial Fighter Squadrons II Expansion Pack introduces eight new squadrons, two each of four different types – the highly Strategic Lambda-class Shuttle, the punishing VT-49 Decimator and TIE Defender Squadron, and the elusive TIE Phantom Squadron. Each of these new types of squadrons comes, in turn, with two cards, one unique and one non-unique.

What will you find among these squadrons? New stat lines and abilities that allow you to better tailor your fleet and squadrons to your overall strategy.

The Lambda-class Shuttle comes with the Relay ability, allowing it to communicate your squadron commands to fighters outside of your ship's command range, but within distance 1–3 of the shuttle. With its Rogue keyword, its eight hull, and a battery armament of three blue dice, the VT-49 Decimator is effectively a tiny capital ship that you can use to harass larger foes, and the TIE Phantom Squadron can Cloak in battle, moving up to distance 1, even if it is currently engaged.

• Features two copies each of four new types of fighter squadrons
• Eight squadron cards allow you to field your squadrons as nonuniques or as ace squadrons
• Rogue VT-49 Decimators feature hull and armament stats that rival those of capital ships
• Permits the exploration of new tactics with its Strategic, Cloak, and Relay abilities

      heti saatavilla
30.20 €
Star Wars Armada: Interdictor Class Star Destroyer Expansion Pack

The Interdictor cruiser was designed a major part of the Empire's response to the elusive Rebel threat. Its gravity-well projectors are capable of wrenching enemy ships out from hyperspace, and its deployment along one of the galaxy’s hyperspace lanes can spell doom for unsuspecting Rebel captains.

Experimental Technology
Veiled in secrecy and designed as more than a weapons platform, the Imperial Interdictor was equipped with an experimental gravity well to rip Rebel ships out of hyperspace. This made it a dangerous tool for the Empire, and the ship's gravity-based technologies are represented in Armada by its new Experimental Retrofit upgrade slots.

Naturally, you can find these upgrade slots featured on both the Interdictor Suppression Refit and the Interdictor Combat Refit.

As you can see, the ship's different configurations force you to decide whether you want your Interdictor to play more of a straight-up combat role or to make greater use of its Experimental Retrofit upgrades to control the battlefield and manipulate your opponent's ships. Both are valid choices, but as with all things Wave III and Wave IV, they require some thought as to how best integrate your decisions into the whole of your fleet and its strategy.

The Combat Refit
As a medium-base capital ship, the Interdictor Combat Refit would appear, at first, to play a similar role in your fleet as a Victory-class Star Destroyer. Both have roughly the same hull values and fleet-point costs, although the Interdictor Combat Refit goes slightly above the Victory in both regards, featuring nine hull to the Victory's eight, and weighing in at ninety-three fleet points, compared to the eighty-five fleet points of the pricier Victory II-class Star Destroyer.

What you get for those extra fleet points, then, is a starship that is a bit more well-rounded. It lacks the big six-die attack from its forward hull zone that the Victory can boast, but it can fire four dice each from three of its four hull zones. This means that if you can line up your shots on the diagonal, you can bring eight dice against a single enemy ship—nearly as many as the nine the Victory can fire when it lines up shots from both its forward hull zone and either its left or right hull zones.

And though it suffers by way of comparison in those big volleys, the Interdictor comes out ahead of the Victory in terms of defense. In addition to its extra point of hull, the Interdictor gains an extra defense token. Instead of the Victory's one brace and two redirect tokens, the Interdictor has one brace, one redirect, and two contain tokens. If its shields ever go down—and there's always a chance your ship's shields will fail—the Interdictor stands a much better chance than the Victory of avoiding any crippling critical damage.

Its fair to say that the Victory's ten total points of shielding, when taken together with its eight hull, make it the more reliable ship. This may be true, especially in the early game, when you can keep your opponent from getting around your flank. However, the Victory has always been most vulnerable through its rear hull zone. There, it has only a single point of shielding, and only two red attack dice. By contrast, the Interdictor's rear hull zone is nearly as strong as its sides, boasting two points of shields and three attack dice—one red and two blue.

The more you look, then, the more you see that the Interdictor may not be as well-suited toward a perfectly crafted early game, but it may do a better job of surviving the unexpected twists and turns that come with the course of battle. This is a fact reinforced, also, by the ship's extra point of Engineering, its reduced Command value, and its ability to take a support team like the ever-popular Engine Techs, which can allow the Interdictor to move effectively one speed-point faster than the Victory and with as many as one click at each joint of the maneuver tool.

Of course, the most important distinction between the Interdictor and the Victory is likely the Interdictor's ability to equip an Experimental Retrofit, such as the G-8 Experimental Projector or the Targeting Scrambler. There are four different Experimental Retrofit upgrades in the Interdictor Expansion Pack, and although your Interdictor Combat Refit can only equip one of them, that upgrade is bound to play a big role in the ship's larger identity within your fleet.

The Suppression Refit
Of course, if the Experimental Retrofit upgrade that you equip on your Interdictor Combat Refit is going to play a large part in defining that ship's role, then you can imagine how much moreso the Interdictor Suppression Refit is bound to be defined by its Experimental Retrofit upgrades.

In addition to the G-8 Experimental Projector and Targeting Scrambler, the Interdictor Expansion Pack offers the Grav Shift Reroute and G7-X Grav Well Projector Experimental Retrofit upgrades.

Taken altogether, these upgrades allow you to temporarily reduce the speed of enemy ships, force your opponent to reroll up to four attack dice, muddle the battlefield with obstacles according to your design, and force your opponent to either deploy his ships outside of a "dead zone" with a radius of range "3" or set the speed dials of all ships deployed within that zone to zero. In short, they change the rules of engagement so that you should never have to fight on even footing.

Of course, the Interdictor Suppression Refit is going to be so tremendously appealing to so many players because these upgrades work particularly well in combination with each other, in combination with upgrades like Admiral Titus and Admiral Konstantine , and in combination with very carefully chosen sets of objectives.

For example, the Grav Shift Reroute gives you a decided edge in any contest in which you are the second player and the first player chooses to play with either your Dangerous Territory or Fire Lanes objectives. Just be sure to place your grav shift token within distance 1–3 of as many obstacles as possible, and you can either fly right through them to score your Dangerous Territory victory points or use them to slow your opponent's progress toward the Fire Lanes objective tokens.

Perhaps you could combine these objectives with the Most Wanted objective and an Interdictor Suppression Refit that carries Admiral Titus, Phylon Q7 Tractor Beams, a Grav Shift Reroute, and the G-8 Experimental Projector.

In this case, if your opponent selects the Most Wanted objective, thinking it will be easier to win that scenario than to figure out how to navigate the cluster of obstacles you might arrange, you can send your Interdictor in hot pursuit of his objective ship, then slow it to a crawl in order to make sure you line up your shots round after round until the ship is no more. This works even better if you can pair your Interdictor with another large or medium ship so that Admiral Konstantine can penalize all enemy ships within distance 1–5 yet another point of speed.

For a long time, one of the greatest challenges facing Imperial players with Victory-class or Imperial-class Star Destroyers has been the Rebels' tendency to slip past the firing arcs of the massive forward guns. Now, by slowing each of those Rebel ships, Admiral Konstantine and the Empire stand much better odds of landing their most powerful volleys squarely on their targets in consecutive rounds.

Force your opponent to navigate the maze of obstacles that you design, or force his most important ship to limp through space squarely in front of your most powerful guns. Either way, this is the sort of focus on your objectives and strategies that you are bound to see propelled to all-new heights by the ships and upgrades in Waves III and IV.

A New Imperial Fleet
As good as its ship, ship cards, and Experimental Retrofit upgrades are, the Interdictor Expansion Pack offers you plenty more ways to reconfigure your Imperial fleet. Among its fourteen upgrades, there are eleven that are brand-new to the game. The Experimental Retrofit upgrades, the Interdictor Title, Admiral Konstantine, and Admiral Titus make up seven, and that leaves us with four more.

Commandant Aresko is priced the same as Wulff Yularen at seven fleet points and features a comparable ability, but instead of granting you a command token when you spend one, he allows you to gain a command token when a friendly ship within distance 1–3 reveals a command. He has to exhaust to use his ability, but if you feel so inclined, he can do so twice while aboard the Interdictor.

As an alternative, the Flight Commander allows you to resolve your squadron command after executing your maneuver. Given the Interdictor's speed and maneuverability when equipped with Engine Techs, this may be a good way to get your commands to a pair of fighter squadrons that got stranded from the rest of the fleet. Odds are, though, that the crew will be better placed elsewhere, like on a flotilla of Gozantis.

As far as your squadron coordination goes, it is less likely to be your Interdictor's primary concern. After all, the ship only boasts a Squadron value of two. However, you can still make good use of your Interdictor to set up your squadrons for activation by your other ships. In the right fleet, the Fighter Coordination Team is an excellent substitution for your Engine Techs and can move a pair of unengaged squadrons without activating them. Whether you use this movement to engage enemy bombers or to get your bombers into position, the fact that your Fighter Coordination Team grants a partial squadron command for no action makes it a noteworthy bargain.

Finally, the Interdictor Expansion Pack gives you access to a new ion cannon, the MS-1 Ion Cannons, which exhaust one of the defender's upgrade cards whenever you roll a critical hit on your blue attack dice. Given the number of blue dice on your Interdictor—much less the number of blue dice you can fire from your Dominator —the MS-1 Ion Cannons are bound to make their presence felt in numerous skirmishes across the galaxy.

The Admiral's Game
With all that it brings to the table—and not just for the Empire—the Interdictor Expansion Pack goes a long way toward truly playing the admiral's game… You do not go to battle without a plan. You devise your strategy. You assemble your fleet. You issue your commands. And then—and only then—you rip your opponent's ships out of hyperspace.

• An Imperial expansion pack for the popular Star Wars: Armada miniatures game
• Features one pre-painted, medium-base Interdictor miniature, two ship cards, and fourteen upgrades
• Permits new strategies that take shape as early as deployment
• Introduces the new Experimental Retrofit upgrade type
• The ability to set traps increases the strategic importance of your objectives

      heti saatavilla
63.10 €
Star Wars Armada: Liberty Expansion Pack

The MC80 Liberty type Star Cruiser is the spearhead of the Rebel Alliance’s fleet, and it boasts some of the heaviest firepower in the Rebel arsenal. Its impressive firepower and powerful forward shielding, demand that it is often among the first ships considered to lead Rebel strike forces into combat.

Fit for Battles Among the Stars
Whether outfitted as an MC80 Battle Cruiser or an MC80 Star Cruiser , your Liberty is a forward-facing, Rebel beast of war. This is a remarkable fact certain to be noticed by longtime Rebel admirals, and it leads directly toward a new Rebel play style.

Apart from the Nebulon-B frigate, the Rebel Alliance's ships have historically fought best while racing around the periphery of the battlefield and firing from their sides. This owes largely to the prominence of the Assault Frigate Mark II during the Wave I days, and it has only been reinforced by the addition of the Home One and Admiral Ackbar.

Right from the game's release, the Rebels have had to try to fly around their Imperial opponents lest they find themselves obliterated in coordinated barrages of retaliatory laser blasts. Neither the Nebulon-B frigate nor the CR-90 Corellian corvette could afford to fly straight at a Victory-class Star Destroyer. One good shot from the Star Destroyer's forward hull zone could simply cripple the Nebulon-B or outright destroy the corvette.

This led the Rebellion toward flanking strategies. Rebel admirals would start with ships at either side of the battlefield and hope to draw the Imperial ships in toward one cluster of ships, sending the other around to chase after the Star Destroyer's much less intimidating rear hull arc. If the Rebel admiral was particularly lucky or skilled, he might even find some way to save the ships that were utilized as bait.

The Assault Frigate Mark II and Home One added more shields and attack dice, but they still played more or less into this strategy. Both of these ships feature their strongest attacks on their left and right hull zones.

With its focus on black dice, the MC30c functions best in close range, but even this odd duck of the Rebel fleet functions best when on a course to fly around the enemy. Like the Assault Frigate Mark II and Home One, its strongest attacks are from its left and right hull zones.

What the introduction of the Liberty adds to the Rebel fleet, then, is a true forward-facing threat. This is the Rebel ship that the Imperials do not want to see headed straight toward them. It features seven attack dice from its front hull zone, which it pairs with five forward shields, two brace tokens, and a redirect. It can both dish out a beating and take one. When you anchor your fleet with the Liberty, you can still send your other ships around his flank, much like you would with earlier Rebel fleets, but because you add a forward-facing threat, your opponent can no longer choose to ignore your "bait." If left ignored, that bait is going to blast some holes through some hulls.

Alternatively, the Liberty may even allow the more creative Rebel admirals to meet Imperial fleets head-on and defeat them. For starters, you might flank it with a pair of Nebulon-B frigates. You might not expect your frigates to last more than a couple of rounds on their own in such head-to-head battles, but the Liberty forces your opponent to reprioritize his shots. If he ignores the Liberty, it will punish him. If he focuses on the Liberty, your Nebulon-B frigates remain in the fight and keep firing.

Where Is the Rebel Edge?
At this point, the skeptic may wonder how the Liberty could possibly allow the Rebels to stand toe-to-toe with an Imperial fleet. After all, the Imperial-class Star Destroyer features an additional attack die in its forward hull zone, and the Victory-class Star Destroyer only features one fewer die, at a reduction of as many as thirty fleet points.

Well, the first consideration is going to be the range of those dice. The Victory I-class Star Destroyer features six forward attack dice, but only three can fire at long or medium range. Once you bump yourself up to the Victory II and its six medium range dice—three red and three blue—you have also raised the ship's fleet point cost by twelve points, now only eleven below the cheaper MC80 Star Cruiser. And for those eleven points, you get two more shields on your front hull zone.

So what happens when you compare the Liberty to the Imperial-class Star Destroyer, then? For 120 fleet points, the Imperial II-class Star Destroyer can rain death with eight dice at medium range. As the MC80 Star Cruiser was only eleven points more expensive than the Victory II, the Imperial II is only seventeen points more expensive than the MC80 Battle Cruiser. And that is on a side of the Galactic Civil War that features such commanders as Darth Vader, Admiral Screed, and Grand Moff Tarkin.

Here, the answer is upgrades and squadrons. In Armada, you are always balancing the fleet points you invest in ships against the fleet points you invest in support for those ships. And the Rebels feature some of the best support in the game. Luke Skywalker, Han Solo, and a pair of B-wing Squadrons are not threats to be dismissed lightly. Nor are your Spinal Armament, Quad Turbolaser Cannons, or High-Capacity Ion Turbines. Utilizing the right upgrades with the right ships is crucial, and the three different Title upgrades in the Liberty Expansion Pack reinforce this idea.

The Endeavor Title grants your MC80 a contain token and plays well with your ship when you intend to launch it into the thick of a protracted firefight. Given that this is a highly likely outcome for any list featuring an MC80 Battle Cruiser or MC80 Star Cruiser, you should expect to see a good number of appearances by the point-efficient Endeavor Title when Wave IV releases.

On the other hand, if you think you can reduce the length of the firefight by blasting right through your enemy's ships, you may lean toward the Mon Karren Title, which prevents your target from spending more than one defense token. Here, the Mon Karren presents a direct counter to the common brace-and-redirect tactic, even before you roll a single point of accuracy, and the fact that your Mon Karren Title reduces your need for accuracy results means that you can use your rerolls and upgrades to increase your raw damage, reassured by the knowledge that it's going to hit… hard.

Finally, the Liberty Title allows you to coordinate your squadrons more efficiently, taking advantage of the fact that your MC80 is bound to be in the thick of combat, serving the Rebel Alliance from positions that may be too dangerous for your smaller ships to approach. For example, the flotilla of Rebel transports you added to your fleet in order to coordinate your bombers may not be able to survive anywhere near the Imperial-class Star Destroyer that your bombers have engaged. Here, for just three fleet points, the Liberty Title allows you to activate up to two of those bombers without ever assigning a squadron command to your dial. Just use Garm Bel Iblis, Leia Organa, the Tantive IV, or a Comms Net to assign a squadron token to your Liberty, and the Title doubles its value.

Clever Command
Not only will your Rebels need to make excellent use of their squadrons and upgrades in order to get the better of Imperial fleets, but they will also need to follow a carefully scripted battle plan—one that can bend, and not break, in the heat of an engagement. And the development of such a detailed and flexible plan demands a clever commander.

The Liberty Expansion Pack introduces such a commander in the form of General Madine. His ability grants your ships extra maneuverability whenever they resolve navigation commands. When one of your ships resolves its navigation command from the dial, Madine allows it to increase one additional yaw value by one. When a ship resolves its navigation command from a token, Madine allows it to choose to adjust its speed or increase one yaw value by one. Madine's ability may appear, at first, to be yet another part of the Rebel flanking strategy—and it can be. But it also allows you to keep your Liberty on course for head-on combat.

If your Liberty is clearly going to win a head-on confrontation with one of your opponent's ships, your opponent is unlikely to aim that ship at the Liberty. Instead, your opponent may attempt the same sort of flanking strategies that the Rebels have long employed.

This, however, is where Madine and his extra maneuverability come into play. His ability allows you to adjust your yaw by as many as three clicks when you reveal a navigation command from the dial, and that sort of turning power may catch your opponent unaware... and squarely in range of your full forward battery armament.

Meanwhile, a ship the size of the Liberty needs far more than just a commander to operate, and the Liberty Expansion Pack also introduces a handful of new officers and teams to help crew your MC80.

The Chart Officer plays into the expansion's theme of direct confrontation, allowing you to plow through asteroids and other obstacles without worry. With the Chart Officer aboard, asteroids will not concern you; you can race straight at your opponent's ship, wherever it tries to hide.

If you have ever wished you had assigned your engineering or navigation command just one dial sooner, the Skilled First Officer may be a tremendous bargain for you. He provides less flexibility than the Support Officer, but he also costs three points fewer. That may not seem like a big deal when you have 400 points to spend, but those three points may prove the difference between seizing the initiative as the first player or going second. Alternatively, they may prove the difference between flying an unnamed MC80 or the heading to battle aboard the Liberty.

A Medical Team can grant you relative immunity to nearly one-third of the critical hits you might suffer. Sixteen of the fifty-two damage cards bear the crew trait, meaning they can not only be ignored by your Medical Team, but completely discarded. When you consider how crippling it can be to suffer a Compartment Fire or total Life Support Failure, the Medical Team is a terrific bargain, especially considering it costs you only a single fleet point.

Finally, the Liberty Expansion Pack offers two more aggressive teams, in the form of the Veteran Gunners and Fire-Control Team. While both increase your odds of crippling your opponent, they do so in different ways. On the one hand, the Veteran Gunners works against weak dice by allowing you to reroll below average results. On the other hand, the Fire-Control Team allows you to get the most from good dice results, kicking your opponent when he is already down by granting you the ability to resolve multiple critical effects.

Even though your Fire-Control Team will not allow you to resolve the same critical effect twice, you can potentially force an opponent to suffer as many as three faceup damage cards by equipping a Fire-Control Team on the same ship as your XX-9 Turbolasers. It can take as many as fourteen damage to destroy an Imperial-class Star Destroyer supported by Admiral Motti, but it may take only one good shot to leave it limping ineffectually in space.

• A Rebel expansion pack for the popular Star Wars: Armada miniatures game
• Features one pre-painted, large-base MC80 Liberty-type Star Cruiser miniature
• Permits Rebel strategies centered around the use of powerful forward guns
• Comes with two ship cards and fourteen upgrades, including a new commander and three Titles
• Includes all necessary command dials, speed dials, and tokens

      heti saatavilla
62.70 €
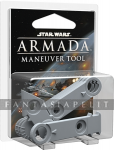
Star Wars Armada: Maneuver Tool

The massive capital starships of Armada feature designs that balance their scale and complexity with ease of use, and the Armada maneuver tool is at the heart of this design. As these ships batter their foes ion cannons, proton torpedoes, and turbolasers, their momentum constantly carries them forward across the battlefield, and the maneuver tool allows you to adjust their courses, even as it accounts for their tremendous inertia.

The Armada Maneuver Tool accessory pack provides you an easy way to add a second maneuver tool to your games. You can also use the Armada Maneuver Tool accessory pack to build a shorter maneuver tool to accompany your full-size maneuver tool and to use with slower fleets or in tighter spaces. With a second maneuver tool built for shorter maneuvers, you can more easily navigate tight squeezes in the heat of battle.

Capital Ship Movement Made Easy
The Armada maneuver tool is one of the game’s most innovative features and makes it easy for you to set a ship’s course.

Capital ships can’t easily vary their speeds or execute hairpin turns like the starfighters that buzz around them. Accordingly, the maneuver tool lends an element of realism to your ships’ pitch and yaw, working in conjunction with your ships‘ available maneuvers to account for their inertia as they fly through the stars.

To set a ship’s course, you begin by resetting the maneuver tool so that all of its joints are straight. Then your ship’s speed indicates how far it will travel along the maneuver tool. At each joint, you can click the tool left or right a number of times away from the center position as indicated by your ship’s speed chart.

Each column on the speed chart corresponds to the speed number at the bottom of the column and shows the number of times that each joint can be clicked while your ship travels at that speed.

The rows on your ship’s speed chart correspond to the joints on the maneuver tool. The row directly above the speed number relates to the first joint, the second row relates to the second joint, and so forth. An “I” indicates that the joint can be clicked once in either direction, while an “II” means it can be clicked twice. Meanwhile, a “–” means the maneuver tool must remain straight at that joint.

Additionally, you are allowed to use the maneuver tool to measure your ship’s possible positions before you commit to the move.

An Innovative and Integral Game Component
In many ways, the design of the Armada maneuver tool is responsible for enabling the game’s fluid, forward-looking approach to ship movement. It is an innovative and integral part of the game. Whether you use it to add a second, full-size maneuver tool to your games or to build a shorter maneuver tool for use in tight spaces, the Armada Maneuver Tool accessory pack ensures that you’ll be able to keep things calm in engineering as you focus all your firepower on enemy ships.

• Contains all the components to build a complete maneuver tool
• Players can choose to build a shorter maneuver tool for use with slower fleets or in tighter spaces
• The maneuver tool’s innovative design introduces ease of use and a realistic sense of inertia to ship movement in Armada

      heti saatavilla
11.80 €
Star Wars Armada: MC30c Frigate Expansion Pack

One of the most powerful mid-level ships in the Galactic Civil War, the MC30c frigate was of Mon Calamari design and presented a lethal combination of speed, high-powered armament, and advanced deflector shields. The trade-off, however, was that the ship was relatively light on hull plating. This trade-off becomes evident, as well, in the MC30c Frigate Expansion Pack, which offers this ship to the Rebel Alliance as a fast, nimble, small-size vessel that can fire as many as five attack dice from its left and right hull zones. However, to do so, it must get within close range of enemy ships where its shields won't long protect it from taking damage against its four hull points.

In addition to its pre-painted MC30c frigate miniature, this expansion pack contains two command dials and ten upgrade cards, along with all the tokens you need to bring this Rebel ship to battle. Of course, as with other Armada expansion packs, the MC30c Frigate Expansion Pack also comes with two ship cards that let you field your MC30c as either the MC30c Scout Frigate or MC30c Torpedo Frigate. Though they share many of the same design elements, the different costs and battery armaments of these two different configurations ensure a wide range of tactical flexibility for your MC30c.

Now this fast and nimble Rebel ship arrives to Star Wars: Armada in the MC30c Frigate Expansion Pack as a small-size vessel that can fire as many as five attack dice from its left and right hull zones. You’ll also find two command dials, ten upgrade cards, and all the tokens you need to bring this Rebel ship to battle.

• A Rebel starship expansion for the Star Wars: Armada miniatures game
• Features one small-base, pre-painted MC30c frigate miniature
• Presents Rebel players with a lethal combination of speed and high-powered armament
• Comes with ten upgrade cards, including Rebel commander General Rieekan
• Includes all the dials and tokens you need to fly your MC30c frigate to battle

      heti saatavilla
47.00 €
Star Wars Armada: Nadiri Starhawk Expansion Pack

The Starhawk-class Battleship was the first capital ship commissioned by the nascent New Republic Defense Fleet after the Battle of Endor. Assembled at the Nadiri Dockyards from the salvage of captured Star Destroyers, the Concord served as the flagship for Commodore Kyrsta Agate during the capture of the infamous Kuat Drive Yards, while the Amity and the Unity joined her in time for the climactic Battle of Jakku. There, all three Starhawks bore the brunt of the battle to destroy the remnants of the Galactic Empire. But how your galactic battles play out is up to you.

As the largest ship in the Rebel fleet, the Nadiri Starhawk can stand against any opposing force, even the fearsome Super Star Destroyer, and the Nadiri Starhawk Expansion Pack provides you with everything you need to add this large ship to your Rebel fleet. This expansion comes complete with one ship and speed dial, four command dials, two ship cards, and fifteen possible upgrade cards, including the courageous commander Kyrsta Agate . After you deploy, Agate allows you to gain 1 non-scatter defense token, which you may discard to resolve the its effect during your "Spend Defense Tokens" step, provided your speed is not 0.

This skill allows one of your existing ships to take advantage of the new salvo defense tokens introduced in this expansion. Spending a salvo defense token allows a ship to perform a salvo attack after the Resolve Damage step of an attack, returning your assailant’s fire shot for shot. Even if your ship is destroyed before performing a salvo attack, as long as the token had been spent it still performs the attack before being removed. Every rebel in the Alliance knows that no matter the cost, they will go down fighting.

      heti saatavilla
122.80 €
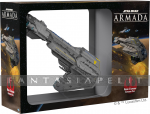
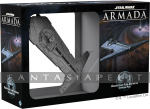
Star Wars Armada: Onager-class Star Destroyer Expansion Pack

The Onager-class Star Destroyer is a specialized platform for some of the Empire’s most dangerous weaponry. The arrival of its ominous silhouette in orbit heralds a bombardment by massive particle cannons, or, more rarely, a devastating pulse from superheavy composite beam turbolasers. Its deployment in more sensitive Imperial operations can be neither confirmed nor denied.

What makes the Onager-class Star Destroyer unique among the Galactic Empire’s specialized collection of ships is its special battery armament. By using its this armament, this incredible ship can perform ignition attacks beyond long range, keeping its crew safe while still wreaking havoc on enemy forces. On top of this remarkable ability, the Onager-class Star Destroyer Expansion Pack provides everything that you as a skilled imperial officer need to add one of these elite vessels to your fleet, including a painted ship, a speed dial, and three command dials as well as two ship cards and fifteen upgrade cards.

Among the officers you may choose to helm your Onager-class Star Destroyer, you will find the assertive Commander Beck. Up to two times during your activation, Beck allows you to resolve a command as if you had spent a command token. If you do, you gain a raid token that prevents you from resolving the matching command type again until you are able to clear it. While this opportunity does come at a cost, it may be well worth it to wipe out a key part of your opponent’s fleet in one fell swoop. With the full power of the Empire at your back, the battle will nearly be over before it even begins.

      heti saatavilla
93.10 €
Star Wars Armada: Phoenix Home Expansion Pack

Under the command of Jun Sato, the Phoenix Home was the nerve center of the fledgling Rebel fleet. A large Pelta-class frigate, the Phoenix Home typically operated with a crew of 900. Although it was not the largest or more powerful of vessels, it was heavily armored and featured turbolasers and point-defense laser cannons. Moreover, what it lacked in size and firepower, it made up for with its ability to command the fleet and control the battle, playing a crucial role as a coordinator of capital ships and fighter squadrons alike.

As revealed in Star Wars Rebels, the Phoenix Home played a critical part in the formation of the Rebel Alliance, and with the upcoming release of Wave V, you can use the Phoenix Home Expansion Pack and its remarkable vessel to unify and strengthen your Rebel forces.

With its forward battery armament of four dice, the Phoenix Home might appear a natural fit for the sort of direct Rebel strategy enabled by the Liberty Expansion Pack from Wave IV. However, the real strength of this vessel lies not in its forward attack dice but in its new Fleet Command upgrade icon. You can only equip one of these upgrades to your Phoenix Home, and all three of the Fleet Command upgrades that come in this pack are unique. Nonetheless, for a handful of fleet points, each of them allows you to spend command tokens to power advantages across every ship or squadron in your fleet!

The Phoenix Home Expansion Pack comes with one pre-painted, small-base miniature Phoenix Home, two ship cards, ten upgrade cards, and all the dials, bases, pegs, and tokens you need to use this ship to lead your growing Rebellion.

• A Rebel Alliance starship expansion for the popular Star Wars: Armada miniatures game
• Features one small-base, pre-painted Phoenix Home miniature
• Introduces the Fleet Command upgrade type to the Rebel Alliance
• Forward battery armament of four dice lends new support to direct Rebel strategies
• Comes with two ship cards and ten upgrades, including a new commander

      heti saatavilla
36.00 €
Star Wars Armada: Profundity Expansion Pack

Where the Imperials gain the Grand Admiral and a number of other characters from Star Wars Rebels in the Chimaera Expansion Pack, the Profundity Expansion Pack offers the Rebels access to the MC75 star cruiser, Admiral Raddus, and Jyn Erso, as well as other notable characters from Rogue One: A Star Wars Story.

All told, the expansion allows you to field its hulking MC75 cruiser miniature using either of two ship cards, then affords you a wide range of tactical adjustments with its fourteen upgrade cards.

With its punishing arsenal, powerful shields, and resilient hull, the MC75 cruiser is bound to make a massive impact upon any battle in which it takes part, but it's only to be expected that certain commanders may use the ship more effectively than others. And there's likely no commander better suited to making sure your MC75 cruiser hits for maximum impact than Admiral Raddus.

As in Rogue One, when his decision to support Cassian Andor and Jyn Erso drew the full strength of the Rebel fleet to Scarif, Admiral Raddus has a habit of bringing reinforcements into your Armada battles, just when it looks like everything's going wrong. At the beginning of the game, Raddus can designate any friendly ship other than his to be set aside, and until that ship finally arrives, your forces will be outnumbered and outmatched. Even if you and your opponent haven't yet begun trading shots, you'll still have forfeited a valuable action with which you could have been baiting your opponent's ships out of position.

But while your forces might temporarily suffer from the absence of any ship Raddus sets aside, they'll rejoice when it arrives. Since it can come in at distance "1" of any friendly ship—and since it can face any direction when it arrives—you'll be able to bring it onto the battlefield wherever it can function most effectively.

You could bring an MC30c Torpedo Frigate out of hyperspace in a position that it's already able to catch its target with a full complement of attack dice. You could bring the Tantive IV into the battle in position to assign an engineering token to your damaged MC80 Battle Cruiser . Or you could fly Admiral Raddus aboard the Profundity , race your CR90 Corvette A around the enemy's flank, and bring both your Mon Karren and Garel's Honor into the battle positioned at your enemy's back.

• A Rebel starship expansion for the Star Wars: Armada miniatures game
• Comes with one pre-painted miniature MC75 Mon Calamari star cruiser
• The new Admiral Raddus commander enables dramatic Rebel ambushes
• Comes with two ship cards and fourteen upgrades
• Introduces Jyn Erso and other notable characters from Rogue One

      heti saatavilla
66.80 €
Star Wars Armada: Rebel Transports Expansion Pack

The Galactic Civil War rages on, and so do the tactical fleet battles of Star Wars: Armada. In Armada, you assume the role of fleet admiral with either the Galactic Empire or Rebel Alliance, assemble your ships, and fly to meet the enemy. The combats are big and brutal, and your strategy must balance your focus on the objective against the destruction of your enemy.

The game's rules for fleet building permit you the freedom to fly the ships that best suit your strategy, and each wave of expansions adds new options for you to pursue. Wave I allowed you to build your fleet to full strength, introducing a classic assortment of ships and starfighters, including Victory-class Star Destroyers, Nebulon-B frigates, TIE fighters, and X-wing squadrons. Wave II increased the game's scope even further, adding the Imperial-class Star Destroyer and Home One as the first large-base ships and increasing the standard fleet build to a full 400 points.

Now, even as the game's core experience remains rooted in your ability to plan your approach, command your ships, and obliterate your enemy, Wave III introduces yet another dimension to your battles. Its two expansions, the Imperial Assault Carriers Expansion Pack and the Rebel Transports Expansion Pack, introduce the "flotilla" to Armada. Treated like standard ships—with a couple of notable exceptions—flotillas come with a host of inexpensive, highly tactical abilities that allow you to coordinate your fleet more closely than ever!

Introducing the Flotilla
The flotilla enters Wave III as an all-new type of ship. Flotillas operate in most ways the same as larger ships, but because they represent multiple, smaller ships, flotillas feature two plastic ship models, instead of one. Apart from this difference, they follow the same rules as other ships, with one exception—when a flotilla would overlap or be overlapped by another ship, only the flotilla takes a facedown damage card. You do not deal a facedown damage card to the closest ship the flotilla overlapped unless that ship is also a flotilla.

Flotillas, however, do more than merely introduce a new type of ship; they also introduce a new fleet support role that you can incorporate into your fleet and games. Both of the flotillas in Wave III feature the Fleet Support upgrade icon. These upgrades are remarkable in Armada because they do less to improve the ship that bears them than they do to boost the rest of your fleet. Bolster your squadrons, repair your ships, or improve your larger ships' ability to respond to immediate threats—Fleet Support upgrades ensure that your flotillas can play a useful role in any attack plan.

Rebel Transports Expansion Pack
The counterpart to the Galactic Empire's Imperial Assault Carriers Expansion Pack, the Rebel Transports Expansion Pack introduces a flotilla of GR-75 medium transports. You can then field these ships as either GR-75 Combat Retrofits or as GR-75 Medium Transports, the first ship in Armada to have no inherent ship-to-ship combat capability.

Still, for what it lacks in its own punch, the Rebel Transports Expansion Pack more than supplies in support. As with the Imperial Assault Carriers Expansion Pack, four of the eight upgrades in the Rebel Transports Expansion Pack feature the Fleet Support icon. This means you can use a flotilla of GR-75 transports to relay commands to your larger ships with a Comms Net, or you can trail behind your largest ships with Repair Crews to keep them in the fight a bit longer. And that can make the difference between victory or defeat. After all, even one additional round of fire from your Home One is easily going to outstrip the contribution that nearly any other Rebel ship could have made over the course of two or three rounds.

The Rebel Transports Expansion Pack's focus on fleet support does not stop with its Fleet Support upgrades, either. It also introduces a new commander and a crew member who can provide free rerolls to friendly ships within distance one to three.

• A Rebel starship expansion for the popular Star Wars: Armada miniatures game
• Introduces the “flotilla” as a new type of small-base ship
• The new Fleet Support upgrade type allows you to coordinate and support your fleet
• Permits a wide range of new Rebel tactics
• Eight upgrades include four Fleet Support upgrades, plus a new commander

      heti saatavilla
31.30 €
Star Wars Armada: Rebellion in the Rim Campaign Expansion

The galaxy is at war. The Galactic Civil War rages across the stars, nowhere more fiercely than the lawless Mid and Outer Rim. Newly promoted commanders lead their fleets to these systems, looking to make a name for themselves as they vie for resources, allies, and ever more control of the galaxy. As they grow in power, all suspect that a grand final battle is approaching in the Rim—one that will determine whether the growing Rebellion will be crushed under the fist of the Empire, or if the spark of hope will burn down the established power structure and allow a new age to begin.

War in the Rim
Rebellion in the Rim is an epic campaign expansion for Star Wars: Armada that takes two to six players to the farthest reaches of the galaxy, where they must fight for control of the territories and resources that may prove invaluable in the wars ahead. Using the innovative campaign mechanics first introduced in The Corellian Conflict, your team must choose to support the Galactic Empire or the Rebel Alliance over the course of multiple battles across the Rim. There, you might just earn enough campaign points to scatter the enemy forces and prove to your superiors that you are a credit to your faction, worthy of advancement and renown.

Rebellion in the Rim increases the strategic complexity of every battle in Star Wars: Armada, whether you favor campaigns or traditional play. With twelve new standard objective cards and eleven new campaign objective cards, every game has a vast array of new possibilities to explore. While completely annihilating your enemy’s forces would be ideal, it is often not necessary to achieve your strategic goal and puts your own crews' lives at risk. You must balance close-proximity dogfights and full fleet assaults with the goals of your operation to ensure that your side does not lose the Rim in exchange for a single victory.

With each new objective comes the chance to tailor a new team, specially assembled to take on the new challenges of this campaign expansion. You may be asked to take out a ship that is Marked for Destruction or be forced to face off against some Hired Scum. Whichever objectives you choose to pursue, you are sure to discover new ways to use your forces and sharpen your skills as a tactical commander.

Tactical Training
Across the Rim, you will encounter new obstacles to challenge your piloting skills and create an immersive gameplay experience as you maneuver through treacherous areas of space, filled with Exogorths, Purrgil, and Gravity Rifts! Unlike a typical game of Armada, the fleets locked in combat in Rebellion in the Rim may feature fleets of unequal power, ranging from small, mobile task forces to expansive team fleets. As you participate in these cosmic clashes, able to be played on a 3’ x 3’ area, you will gain experience to upgrade your own powers, until your adventure culminates in an epic, pivotal battle to determine the fate of your team and the destiny of the Rim.

The significance of each battle is fully felt as your ships may suffer permanent damage, as you add new vessels to your fleet, or when you lose vital allies in the chaotic firefights. But with each fight, you also have the chance to gain experience and learn from your mistakes and triumphs with brand-new mechanics for building your own unique commander. Rather than having a commander upgrade card attached to your flagship, you will name your own commander, adding them to your roster sheet, and choosing an ability like Repair Expert or Independent Raider to specialize your commander at the start of the campaign. Then, over the course of your battles, you can spend experience to keep developing that ability until your commander is a true master of their field.

Heroes on Both Sides
But there is more to building a successful fleet than heading it with a powerful commander. While the heart of Star Wars: Armada is the detailed miniatures of the galaxy’s largest ships, these vessels would be nothing without the brave men and women who operate and maintain them. When you assemble your fleet, Rebellion in the Rim gives you the option to improve your forces with 28 available upgrade cards, including iconic officers to tap the full potential of your forces. The Rebel Alliance gains the help of Mandalorian Sabine Wren, who can place a proximity mine to cut off an enemy’s route during the ship phase. Then, on the side of the Galactic Empire, the commander of the Inferno Squad, Iden Versio, lets her ship cancel one die when it evades. Alternatively, Iden can execute a one-time raid on an enemy ship, so long as she can maneuver into close range!

As you select the soldiers who will protect your interests in the Rim, this campaign expansion also presents you with eight unique squadron cards to help lead your fleet if you have the Rogues and Villains Expansion Pack in your collection. The Rebels will find no greater defensive force than the legendary Lando Calrissian , designed by 2018 Star Wars: Armada World Champion Nathan Coda. While he pilots the Millennium Falcon, Calrissian can set a chosen die to any face by discarding a defense token, and then keep that die protected from any further tampering by your opponent.

Otherwise, if you choose to lead the Imperial forces, you may upgrade your firepower by adding the fearsome attack droid IG-88B to their ranks. While the IG-88 has appeared in the Rogues and Villains Expansion Pack, the B-version increases your chances to land critical blows by replacing two of IG-88’s four blue dice with black dice. Beyond this, at the start of the Squadron Phase, IG-88B lets you toggle your activation slider to the activated side to perform anti-squadron attacks against each nearby enemy squadron. While these attacks are treated as obstructed, this move may prove invaluable if you find yourself surrounded by Rebel swarms. After all, if word reaches the Emperor that you lost a battle to a worthless troop of Rebel scum, the Rebels themselves will be the least of your worries.

Accept the Mission
A new challenge has been laid before you, and now is your chance to leave a lasting mark on the galaxy. Will you crush the Rebellion or liberate the galaxy? Jump through hyperspace and ready your fleet for the fight of a lifetime. The fate of the Rim is in your hands!

      heti saatavilla
46.50 €

Hakusivu: 1 2 3 4

Uutuuksia