Tuotehaku

Ruutunäkymän liikennevaloissa vihreä on heti saatavilla, punainen juuri nyt loppu varastosta, keltainen ei vielä ilmestynyt tai huutomerkin kera ei hyllyvalikoimaa, eli me tilaamme sitten, kun sinä olet tilannut meiltä. Saatavuusinfossa kerrotaan tarkemmin saatavuustiedoista.

Haun tulokset 1 - 24 / 96


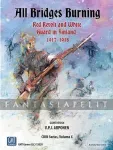
All Bridges Burning: Red Revolt and White Guard in Finland, 1917-1918

The year is 1917. Russia’s Tsar Nicholas II has abdicated and Russia slides toward an ever deepening internal crisis. On the western edge of the vast Russian Empire, the uncertainty in Russia is giving rise to a power vacuum in the semi-autonomous Grand Duchy of Finland. For many across the Finnish political spectrum, the turmoil in Russia looks like an opportunity to fulfill the dream of Finnish national independence. Yet the competing factions are unable to agree on a common political vision for the country. By January 1918, a bloody civil war will have broken out in Finland.

All Bridges Burning recreates the political and military affairs of the Finnish civil war in a new COIN System volume for three players. The Reds seek to stage a working class revolt and then hold on to their gains, while the White Senate forces seek to reassert control. A third, non-violent Social Democratic faction fights for the survival of moderate leftism and political reform. All three factions must keep the national sentiment conciliatory enough for a post-conflict settlement and national independence. In addition, the non-player powers of Germany and Russia offer military assistance to the Senate and the Reds, respectively. Excessive foreign involvement, however, could quash the dream of Finnish independence and prompt a collective loss of all three player factions. Historical events, asymmetrical action menus, as well as extensive historical design notes familiarize the players with the historical period.

A unique sequence of play for three factions poses players – whether veteran or new to the COIN Series – fresh challenges in selecting from the asymmetric commands and special activities. The Reds will find themselves needing to split time and resources between competing tasks of solidifying the Red revolt by creating working organs of civilian administration on the one hand, and fighting an increasingly desperate war against a far more powerful enemy on the other. The White Senate faction, in contrast, has a more traditional war to fight. The Senate will want to enhance their military performance by capabilities such as armored trains, cannons, as well as the Finnish, German-trained 27th Jaeger Battalion. Meanwhile the Social Democrats will be focused on building and maintaining underground networks of information, distributing news across the fronts, and advancing a stagnating political process while fending off retributions from the two warring factions.

A simple but effective card-driven non-player system enables the game to be played solitaire as well as in a two-player mode. The structure of the sequence of play, the character of the commands and special activities in the game, the smaller number of players, and compact size combine to enable All Bridges Burning to play fast. The solitaire system has been designed to preserve that speed and fluidity of play.

Game Components:
* A 20" x 251/2" mounted game board
* A deck of 47 Event cards
* 17 Solitaire system cards
* 88 wooden pieces
- 20 red octagonal pieces, embossed
- 20 white octagonal pieces, embossed
- 6 blue octagonal pieces, embossed
- 3 red discs
- 2 blue discs
- 6 gray cubes
- 6 brown cubes
- 3 red cubes
- 3 white cubes
- 2 red cylinders, embossed
- 2 white cylinders, embossed
- 2 blue cylinders, embossed
- 1 gray cylinder, embossed
- 6 tan and 6 green pawns
(Note that some spare wooden pieces are included.)
* A sheet of markers
* The Rules of Play booklet
* A Playbook booklet
* Three 6-sided dice: 1 red, 1 white, 1 blue
* 3 Faction player aid foldouts, each including the German Actions Flowchart
* 1 Sequence of Play and Attack Procedure sheet
* 1 Solitaire Play Aid Sheet

Game Features:
* Number of Players: 1 – 3 (includes full solitaire system)
* Time scale: 6 to 9 months per campaign of 10 cards

Designer: VPJ Arponen
Developer: Örjan Ariander
Series Creator: Volko Ruhnke

      heti saatavilla
93.60 €
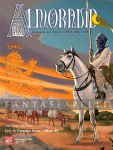
Almoravid: Reconquista and Riposte in Spain, 1085-1086

How can we live in the same basket as the serpent? - Andalusian poet Ibn al-Gassal on the fall of Toledo

Al-Andalus, 1085. The western jewel of Islam had broken into pieces. The petty Taifa emirs who inherited the once-mighty Caliphate squabbled and fought, then paid the Christian lords Parias in gold to avoid fighting at all. Alfonso VI, Christian king of a unified León and Castilla, could now put his extorted dinars to work. He would muster a great feudal host—not merely for plunder but to rip out the heart of Muslim Spain. He would seize the ancient Visigothic capital of Toledo and with it the great central plain to declare himself imperator of all Iberia.

But Alfonso would find there was fight left in al-Andalus, as Christian strikes radiating from Toledo were too much for even the emirs in their pleasure palaces to bear. Al‑Mutamid of Sevilla, the strongest among them, would risk the Taifa dynasties’ independence and call to arms a Muslim force unlike any that the Christian Kings had faced. Granada and Badajoz would join him to invite the Almoravid fundamentalists in to save the Muslim faithful. Yusuf, Sultan al‑Murabitun, had secured his Berber empire in Africa and seized a port and fleet just across the Mediterranean strait from al-Mutamid's Algeciras. A titanic campaign for Spain was set to unfold.

Almoravid, Volume II in Volko Ruhnke's Levy & Campaign Series, takes us from Nevsky’s frozen northeast frontier to medieval Latindom's opposite corner. The same base rules show the muster of lords, their levy of forces and capabilities, and their command of armies on campaign across 11th-Century Spain. But al-Andalus was not Russia: your lords will enjoy good Roman roads and gentler seasons but must bypass or smash against Iberia’s profusion of tough Moorish fortifications. Taifa politics and Parias tribute will guide your military strategy. African troops, bloodthirsty crusaders, the avaricious Cid—each may or may not make their appearance. And all will play out across a field half again as large as that of the first volume.

GAME CONTENTS:
* One 22x25½ inch Mounted Map
* 177 Wooden pieces
* 108 Playing Cards
* Three full-color Countersheets
* 17 cardboard Lord and Battle mats
* One Lords sticker sheet
* Four Player Aid sheets
* Two Screens
* Rules Booklet
* Background Booklet
* Six 6-sided dice

GAME SCALE:
PLAYERS: 1-2
TIME: 40 Days per turn
UNITS: 100-200 Horse or 200-400 Foot
AGE: 14+
MAP: Point-to-point, 400 miles across

Game Designer: Volko Ruhnke
Research: Albert Alegre Jove
Development: Wendell Albright

  !   tilattava tuote
116.30 €
Andean Abyss: Insurgency and Counterinsurgency in Colombia

Colombia: Nation at the Edge of Abyss
Colombia in the 1990s hosted one of the world’s last Marxist guerrilla armies, brutal drug lords, and right-wing death squads and appeared close to failing as a state. A decade later, its Marxists had lost their top leaders and rural sanctuary, its big drug bosses were dead or in prison, and its paramilitaries were negotiating demobilization. The Government had extended its writ to most of the countryside, restored its popularity, and improved the economy and respect for human rights.

Andean Abyss takes 1 to 4 players into this multifaceted campaign for control of Colombia: guerrillas and police, kidnapping and drug war, military sweeps and terror. Each of four factions deploys distinct capabilities and tactics to influence Colombian affairs and achieve differing goals. Players place and maneuver 160 wooden pieces across a colorful map and exploit event cards that cannot be fully predicted. Accessible mechanics and components put the emphasis on game play, but Andean Abyss also provides an engrossing model of insurgency and counterinsurgency in Colombia—smoothly accounting for population control, lines of communication, terrain, intelligence, foreign aid, sanctuaries, and a host of other political, military, and economic factors.

A New Kind of Card-Assisted Wargame
From the award-winning designer of Wilderness War and Labyrinth, Andean Abyss features unique mechanics relating events and operations that guarantee difficult player decisions with each card flip. Most of the game’s 72 events are dual-use, representing alternative historical paths: players can choose either version of the event or from an array of operations and special faction activities. Every choice has implications for how the next card will be played. There is no hand management: the focus is on the map and on planning for the foreseeable—and the unforeseeable. Die rolls are only a small part of game: the key to victory is not luck but the ability to organize the most effective campaign.

Multiplayer, 2-Player, Solitaire
Andean Abyss provides up to 4 players with contrasting roles and overlapping victory conditions for rich diplomatic interaction. For 2- or 3-player games, players can represent alliances of factions, or the game system can control non-player factions . Or a single player as the Colombian Government can take on the leftist FARC, the right-wing AUC, and the narco-trafficking cartels. The non-player insurgents will fight one another as well as the players, but too much power in the hands of any one of them will mean player defeat.

COIN Series, Volume I, II, and (planned) III
Andean Abyss presents a game system on modern insurgency readily adaptable to other conflicts, particularly those featuring the interaction of many sides (thus our new COunterINsurgency series). A rich and under-represented history of 20th-Century guerrilla warfare beckons. Next up for the COIN series is Volume II: Cuba Libre: The Cuban Revolution (now on the P500 list), and Volume III: Bush War—The Fall of Portuguese Angola.

COMPONENTS:
* A 22' x 34' mounted game board.
* A deck of 76 cards.
* 170 wooden forces pieces (some embossed) .
* A sheet of markers.
* 7 player aid sheets.
* Rulebook
* Playbook
* 3 6-sided dice

TIME SCALE multiple years per Propaganda round
MAP SCALE Area Movement
UNIT SCALE Varies
NUMBER OF PLAYERS 1-4 (full solitaire system)

DESIGNER: Volko Ruhnke
DEVELOPER: Joel Toppen
ART DIRECTOR: Rodger B. MacGowan
MAP and CARD ART: Chechu Nieto
COUNTER ART: Chechu Nieto & Xavier Carrascosa
PACKAGE DESIGN: Rodger B. MacGowan PRODUCTION COORDINATOR: Tony Curtis
PRODUCERS: Mark Simonitch, Andy Lewis, Tony Curtis, Rodger MacGowan, & Gene Billingsley

      loppu varastosta
97.50 €
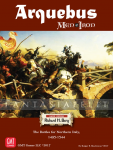
Arquebus: The Battle for Northern Italy 1495-1544

A Military Revolution: A Renaissance in Warfare
The Battles for Northern Italy, 1495-1544

Northern Italy - and especially Milan - at the end of the 15th century was the brutal focal point for power and control between France and the Imperialist empires of Venice and Spain. And the battles fought for this prize are a record of the changing face of how war was fought.

At the start of the 'war', the main forces were mounted men-at-arms and a tightly packed and closed formation of pike, especially as represented by the Swiss. But as battle churned into battle, that slowly changed. Firepower, in the form of the arquebus (an early musket) became increasingly prevalent and dominant, forcing the closed pike formations to open up, as the Spanish did (with sword and buckler), and the reliance on heavily mounted cavalry to decrease.

ARQUEBUS shows all of this in true die-rolling glory, featuring 8 major battles: Fornovo, Cerignola, Agnadello, Ravenna, Marignano, Bicocca, Pavia, and Ceresole. These are all really great game-players, with all but two of them half-mappers playable in 3 hours or less. The other two are the 'tiny' page-sized (8" x 11") Cerignola and the big one-mapper, the major, final battle of Pavia. Pavia was a crushing defeat wherein France lost over 50% of its army and almost all of its nobility of command, including her king, Francis I, who was captured. But for gamers, Pavia is wonderful gameplay, with units all over the greatly detailed map, much maneuver and many tough decisions to make.

ARQUEBUS uses the popular "Men of Iron" mechanics with much concentration on detail of weaponry, from the differences between closed formation and open, to the decline of the Swiss (pas d'argent? pas de Suisse), and the rise of the German Landsknecht, the major force in warfare of the era and, ironically, the best-dressed men in Europe. Yes, Landsknecht uniforms literally set the fashion trend at the time for the entire western world.

And to match this sartorial splendor will be the great visual look of ARQUEBUS, from the colorful units to the splendid maps and helpful charts. Most the battles are good for solitaire play, so when you're traveling to roll those dice, remember to Take The 'BUS!

Components:
* 2 - 22x34” double-sided color maps
* 3 Counter Sheets (840 Counters)
* 3 Player Aid Cards
* 2 d10 Dice
* 1 Rule book
* 1 Battle book

Game Features
TIME SCALE 1 to 5 hours
MAP SCALE 125 yards per hex
UNIT SCALE 500-1000 Pikemen, 300-400 Missile troops and Light Cavalry, 150-200 Men-at-Arms, and 4-6 Cannons per counter
NUMBER OF PLAYERS 1 - 2

Designer: Richard H. Berg
Developer: Ralph Shelton

  !   tilattava tuote
84.30 €
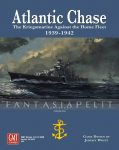
Atlantic Chase: The Kriegsmarine Against the Home Fleet, 1939-1942

In the warm electric light beneath Westminster in the heart of London, the Prime Minister stares intently at the wall. He is pondering lines drawn upon a massive chart in his underground Cabinet Room. That map records the last known positions of numerous convoys and task forces in the Atlantic Ocean, each represented by pins and strings. Anxiety and frustration keep him there. The pins and strings convey old information, and the Prime Minister is keen to update the situation as he waits for new reports that will change the map. He has taken to lingering in that room often in recent weeks as he and his subordinates endure the hours as battles unfold and fate tips in one direction or the other. The balance has not been kind to the Royal Navy.

It is March 18, 1941, and Winston Churchill is momentarily quiet as he ponders that wall. He is dictating a radio address to the nation, struggling to find the words. He must acknowledge that twenty-two British merchant ships, nearly 120,000 tons of materiel, have just been sent to the bottom by two German battlecruisers. Those raiders are now represented as a pin on that map, refitting in a French port for their next campaign, a coordinated action intended to link forces with another ship, the mighty Bismarck. Churchill fears that ship above all others, and dreads the day he will see her represented on the chart before him.

The Prime Minister takes another puff of his cigar and clears his throat, prompting the secretary to ready his fingers at the typewriter. After another puff, he continues: "We must regard the Battle of the Atlantic as one of the most momentous ever fought in all the annals of the war."

Atlantic Chase simulates the naval campaigns fought in the North Atlantic between the surface fleets of the Royal Navy and the Kriegsmarine between 1939 and 1942. It utilizes a system of trajectories to model the fog of war that bedeviled the commands during this period. Just as the pins and strings adorning Churchill’s wall represented the course of the ships underway, players arrange trajectory lines across the shared game board, each line representing a task force’s path of travel. Without resorting to dummy blocks, hidden movement, or a double-blind system requiring a referee or computer, players experience the uncertainty endemic to this period of naval warfare. This system also has the benefit of allowing the game to be played solitaire, and to be played quickly.

The German player’s task is clear: sever Britain’s lifeline to its overseas colonies and allies. All hangs on the fate of convoys. Ultimately, success or failure in Atlantic Chase will hinge on the Kriegsmarine’s ability to breakout into the Atlantic and find convoys while frustrating British attempts to catch his raiders. The game chronicles the development of the Royal Navy’s strategy to contain the German fleet by pitting players against each other in five successive operations that comprise a Campaign Game. Seven additional scenarios treat specific historical actions, including a Sink the Bismarck scenario, a PQ17 scenario, and the Channel Dash. The game features battleships, aircraft carriers, cruisers, convoys, and pocket battleships, while U-boats, elusive armed merchant raiders, and air assets play an important role too. Operations during the Campaign Game and stand-alone historical scenarios each take 1-2 hours to play.

Will the German player do what the Kriegsmarine never managed, execute a large-scale coordinated operation knocking Churchill to his knees? Or will the Admiralty catch and destroy Germany’s great battleships before they become an unanswerable force?

The Game
Imagine a convoy on its way from Halifax to The Clyde ports, maintaining radio silence. Churchill and his Admiralty know when and where that convoy launched and know its destination, but for now, while it steams east, they can’t be certain of its location. Only when calamity befalls it will the task force’s position on the map be clarified – when it is attacked by a U-boat, or an enemy battlecruiser has managed to intercept it, prompting the convoy to radio home. That prompts the Admiralty to dispatch elements of the Home Fleet to engage the German Raiders. The hunter is now the hunted, as the German battlecruisers strive to elude the Home Fleet and return to port, or perhaps double back and continue their rampage. In this game, either player may take to the offensive, and each must weigh the advantages of aggressive action against the risk of losing precious assets.

Each task force on the Operations Map is represented either as a point or a line, the pin or the string. As a point, the task force’s location is known, but as a line it is a fuzzy entity. It’s location is somewhere between each end of the line and neither player knows exactly where that point resides.

As a line, a task force is harder to bring to battle. Its line, called a trajectory in the game, indicates a probable course. The ships that comprise that task force are kept off map on a Task Force Display, and they are understood to be in a group somewhere between the two ends of the trajectory. To bring those ships into port, or to battle, the trajectory must be reduced to a point.

There are no turns in Atlantic Chase. While a player has the Initiative, they activate task forces to perform actions, and continue doing so until they lose the Initiative. The game swings back and forth until the scenario or operation is complete, each player striving to bring the enemy to battle under advantageous circumstances. Typical of the historical events depicted by the game, battles tend to be fleeting and short, interspersed with air searches, evasive maneuvers, air attacks, and attempts to break away to safety.

Players conduct actions to “clarify” lines into points, thereby determining where battles happen or ships slip into port. Will German Raiders intercept the convoy or will British ships and aircraft intercept the Raiders first?

"In naval warfare, success and failure are only a hairline apart. A wrong decision or one a minute late, the wrong interpretation of a message, a bad change in the weather, an unfortunate hit – any of these can change victory into defeat in a twinkling."
- Grossadmiral Erich Raeder

COMPONENTS:
* 22 x 34" mounted game board
* Two 8.5"x11" Inset Maps
* Three 11"x17" player aid cards
* Two 8.5"x11" player aid cards
* Two Task Force Displays
* Sheet and a half of counters
* 240 wood segments and cylinders
* Rule book
* Advanced Battle Rules
* Tutorial booklet
* Solitaire Scenario booklet
* Two-player Scenario booklet
* Four six-sided dice

DESIGNER, ART, & LAYOUT: Jeremy White
PRODUCTION COORDINATOR: Tony Curtis
PRODUCERS: Mark Simonitch, Tony Curtis, Andy Lewis, Rodger MacGowan, Gene Billingsley

      loppu varastosta
89.70 €
Barbarossa: Army Group Center 1941, 2nd Edition

We are happy to present the long-awaited second edition of this fascinating game. It stands as the first in its series to benefit from a full system overhaul. We have rewritten all first edition game rules for clarity and simplification and then reorganized it for readability. Some old rules details were dropped, others added. We then thoroughly reviewed the orders of battle in light of considerable information that has come to light in the years since the first edition was published. Likewise, the charts and tables have benefitted from some small adjustments. Overall, the whole game system is greatly improved for your enjoyment.

Historical Setting
June 1941 -- Army Group Center hurls itself through the Soviet border defenses, and its two Panzer groups race headlong toward Minsk. Behind them lie the remnants of the Soviet Western Front -- almost a million men in four armies. The Soviets are stunned by the German Blitzkrieg. Their responses are slow, confused, and governed by pre-war contingency plans made obsolete by the speed of the German advance. In little more than a week, the German panzer spearheads meet east of Minsk. Though isolated units continue to fight, the entire Soviet Western Front has ceased to exist!

The Germans' next target is Smolensk, but the Soviets resist more effectively. Entire armies are dispatched from other parts of the Soviet Union as the true scope of the Minsk pocket disaster and the magnitude of the German threat become known. Soviet counterattacks, especially around Lepel, are thrown back with horrific losses. Once again the Panzer Groups charge eastward, creating yet another huge Soviet pocket west of Smolensk. The Soviets resist savagely. Smolensk falls on July 13th, but the pocket does not close. Many Soviet units escape to fight another day.

Hitler now makes a fateful decision and overrides his generals. Over half of Army Group Center's armored and air formations are diverted south to take Kiev or north to isolate Leningrad. No longer under heavy pressure, the Soviets gain time to form solid fronts around Vyazma and Bryansk. Did Hitler's decision cost the Germans the war? Play Barbarossa: Army Group Center and find out for yourself.

Components:
* Four 22x34 inch full-color maps (Series Maps C, D, H, and I)
* One 22x8.5 inch map (Map WA)
* 1120 multi-colored die-cut ½ inch counters
* One 48 page Rule Book
* One 40-page Play Book
* Three 11 x 17 Scenario Cards with map and set up
* Player Aid Cards: five two-sided Set-Up cards, Soviet and Axis Air Status cards, two 11x17 two-sided game chart cards, six cards with additional charts and tables.

Game Features:
* Eight scenarios allow players to vary their level of involvement, complexity, and starting point, from introductory to full campaign
* An asymmetrical sequence of play that highlights Axis armored breakthroughs and Soviet difficulties in combined arms warfare. This includes a “non-op” Soviet HQ system to simulate the rigid, yet fragile, Soviet Command structure
* Detailed air rules which integrate with land combat and weather rules
* Incredibly detailed Order of Battle, including special coverage of artillery, rocket artillery, engineers, bridge units, armored trains, and much more
* Modifications to the proven “EFS” include many revised rules and procedures, as well as new Order of Battle information
* Extensive bibliography and design/historical notes

TIME SCALE 2 days per turn
MAP SCALE 5 miles per hex
GROUND UNIT SCALE Division/Regiment
AIR UNIT SCALE 40-80 aircraft per counter
NUMBER OF PLAYERS One to four

Awards & Honors (First Edition):
*1998 Charles S. Roberts Best World War II Board Game Nominee
*1998 Charles S. Roberts Best Wargaming Graphics Nominee

DESIGNER Vance von Borries
DEVELOPER Tony Curtis
ART DIRECTOR Rodger B. MacGowan
COUNTERS Rodger B. MacGowan and Gene Billingsley
Original Research: Thomas F. Burke
PRODUCER: Gene Billingsley

  !   tilattava tuote
115.70 €
Battle of White Plains: Twilight of the New York Campaign

Most authors relegate the Battle of White Plains to a short paragraph when recounting the New York Campaign of 1776. As the last field battle of that campaign, however, it deserves closer study. Volume 10 in GMT’s award-winning Battles of the American Revolution series by designer Mark Miklos provides such a much-needed analysis.

History
As it occurred, the Battle of White Plains could properly be called the Battle for Chatterton Hill. This relatively limited affair, fought on the American right flank on October 28, 1776, was the only set piece action between the two protagonists. Here some 4,000 British and Hessian troops attacked fewer than 2,000 Americans with the King’s forces ultimately prevailing.

The main armies, however, were enormous for the period with 14,500 Americans confronting 13,000 British and Hessians who were eventually reinforced to 15,400, making this one of the largest concentrations of opposing troops during the war and the largest game in the Battles of the American Revolution series to-date. Yet despite this concentration of forces along a front barely three miles wide, the armies sat primarily idle after the fight for Chatterton Hill while the British probed at the flanks, and the Americans improved their defenses.

Washington had chosen a strong position which he fortified with two concentric lines of fieldworks that bristled with forty guns. His flanks were anchored on high hills and further secured by the Bronx River to the west and swampy wilderness to the east. Secure in these positions, Washington welcomed the prospect of a frontal assault against his works.

For his part, General Howe’s reluctance to launch a frontal attack was due in part to his having witnessed the Battle of Bunker Hill in June, 1775, the memory of that slaughter still fresh in his mind. The weather at White Plains was also a mitigating factor with cold autumn rains falling for much of the week during which the armies remained in contact. Finally, Howe’s own proclivity to hesitate when decisive victory was within his grasp further exacerbated any plans for a major British assault.

Washington reacted to the loss of Chatterton Hill by initially refusing his right. Sensing the growing weight of the British host, he eventually swung on a hinge leaving his left where it began, on Hatfield Hill, while pulling the rest of the line back approximately two miles to even higher ground in the North Castle Heights where he dug new fieldworks. Like two heavyweights maneuvering to shorten the ring, each sought an opening—Howe to press the attack on favorable terms and Washington to receive the attack on fortified ground of his choosing.

Ultimately reinforced by Lord Percy with six regiments plus some newly-arrived Hessians and having discovered no viable way around the flanks, General Howe determined to attack Washington frontally on the morning of October 31. He stood his men to arms at 5:00 am but driving morning rains cooled his ardor and the army was again ordered to stand down.

There was more probing and some long range artillery fire against the American flanks on November 1 to no great consequence. Howe now believed he was facing only an American rear guard in the North Castle Heights lines and saw no value in attacking it, believing that Washington with his main force had already evaded him by marching further north. The armies, therefore, sat staring at one another until November 5-6 when General Howe elected to turn south to complete the conquest of Manhattan by capturing Fort Washington which he did successfully on November 16. As Howe turned south, Washington turned north. He divided his forces into three groups. Major General Lee was to screen the approaches to New England while Major General Heath was to guard the Hudson Highlands and points north. The commander-in-chief with the balance of the army crossed the Hudson River at Peekskill and marched south through New Jersey to stay between the British in New York and the American capitol at Philadelphia.

Throughout the White Plains campaign, the prospect for a decisive victory was ever-present. The fact that it didn’t occur is a fascinating story.

Research
White Plains is among the least written-about battles of the American Revolution, an oddity when one considers the scale of forces engaged. Most secondary sources give it a passing mention in the larger discussion of the New York campaign while among the scant primary sources there is considerable disagreement as to key details. Source maps are scarce and often contradictory as well. To bring you Volume 10 in the Battles of the American Revolution series, exhaustive research was conducted in the sources and on the ground to bring to life the most accurate battlefield map possible.

Likewise the order of battle was painstakingly reproduced from scraps of information: memoirs, General Orders, casualty lists, pension records, compilations of the Westchester County Historical Society, journal articles, Blogs, secondary-source histories, firsthand accounts, and a little intuition. As usual when studying the American Revolution, British records are more complete. American records less so. Where specific unit placements are known the corresponding units are placed accordingly. Where specific deployments are not known, deployments are notional but stand up to the litmus test of brigade and divisional integrity.

The Game
The game includes three scenarios: the historical fight for Chatterton Hill, an October 31 scenario that explores what might have occurred if Howe had pressed his grand assault that day as planned, and a full four-day campaign game spanning 42 game turns beginning with the arrival of the British army on the field on the morning of October 28 and culminating at 5:00 pm on October 31.

Each player has 26 Opportunity Cards subdivided into three decks to enhance play and add elements of variability and historical flavor. As with previous games in the series, some special rules represent the unique circumstances of this battle. Among these are rules governing American sortie restrictions and tactical doctrine, rain game turns, restoring army morale, scorched earth, and additional handicaps for American militia, American fieldwork construction, and an off-board movement mechanism for Tarrytown on the Hudson River, seven miles away where British ships lay at anchor. Even Washington’s own combat prowess at this early stage of the war is randomized.

In Volume 10 of the Battles of the American Revolution series, players command two titanic armies: Washington, desperate to salvage something from the otherwise disastrous defense of New York, and Howe seeking a coup de grâce against the “Old Fox.” You will have to manage your forces over the span of four days with lots of inclement weather to contend with. Can you, as General Howe, break through the American line to deliver a decisive blow and end the rebellion? Can you, as General Washington, hold your own on superior ground, hampered as you will be with some 6,700 militia of dubious quality—fully 46% of the total American force?

COMPONENTS:
* 2 hard-mounted maps featuring 1-inch hexes
* 245 Unit counters & game markers (1.5 counter sheets), including 7 replacement counters for previous games in the series
* 52 Opportunity Cards: 26 American & 26 British
* 16 Tactics Cards: 8 American & 8 British
* 2 Full color, four-page player aid cards: 1 American & 1 British
* 1 Full-color exclusive rule book
* 1 Full-color series rule book
* 2 10-sided dice

Game Scale: 1 hr. per turn
Map: 200 yds per hex
Units: Infantry Regiments, Battalions & Companies. Cavalry Troops. Artillery Batteries. Each Strength Point equals 100 men or 2 guns.

Players: 1-2 GAME and SERIES DESIGNER: Mark Miklos DEVELOPER: Rob McCracken SITE RESEARCH: Phil Varker

      heti saatavilla
89.70 €
Beneath the Med: Regina Marina at Sea, 1940-43

Beneath the Med is a solitaire tactical-level game placing you in command of an Italian submarine during WWII. This is the fourth game in the The Hunters series, and covers one of the largest fleets of submarines in the world at the time. You command one of many submarine models available starting in 1940, and look to successfully complete patrols until the armistice in September 1943. Not only is this a standalone game, but fans of The Hunters will enjoy having the capability to complete Italian careers in one of the many interesting classes of Italian submarine.

While your mission is to destroy as much Allied shipping and as many Capital ships as possible, players will find it extremely challenging to survive until the Armistice.

Beneath the Med is purposely designed to deliver a brisk yet intensive gaming experience that forces many decisions upon you as you take command of the major Italian submarine classes. All the major classes are accounted for, with every level of detail, including period of service, armaments, crew make-up, damage capacity, and more. Fans of The Hunters will enjoy the same nail-biting game system, but will be challenged by the thick Allied air cover and the problematic fire control systems of the Italian boats.

Ten Italian submarine classes are profiled and available for you to choose from. Patrol zones reflect the period during the war at sea and will shift as the war progresses. All stages of the U-Boat campaign are represented; difficult missions include mine-laying, commando delivery, and the extremely dangerous harbor penetration missions.

The major Italian classes are are represented and accurately profiled for the patrols you will undertake during the war:

* Acciaio Class
* Adua Class
* Cagni Class
* Calvi Class
* Foca Class
* Glauco Class
* Liuzzi Class
* Marcello Class
* Marconi Class
* Perla Class

Patrol Assignments include:
* Atlantic
* Brazilian Coast
* Caribbean
* Eastern, Central and Western Mediterranean
* Singapore
* Spanish Coast
* West African Coast

The game delivers an historical narrative as 480 ship targets are uniquely identified (including tonnage) with their historical counterparts that were sunk during the war, including freighters, tankers, and American ships.

Game System Highlights:
* 10 Italian submarine classes represented
* 9 different Patrol Assignments, including supply delivery to Japan
* 480 named shipping targets, including 20 Capital ships
* Special Missions for Commando Team Delivery, Supply Delivery, Human Torpedo attack, and Minelaying
* Combat encounters with individual ships, ships with escort, convoys, enemy submarines, and aircraft
* Daytime and Night Engagements
* Submarine damage includes flooding, hull, torpedo doors, periscope, fuel tanks, crew injury (by crew type), engines, hydrophones, AA gun(s), deck gun, batteries, radio
* Crew Advancement, Commander Promotion including decorations such as the "Medaglia d'oro al Valor Militare," the "Medaglia d'argento al Valor Militare," and the "Medaglia d'bronzo al Valor Militare," along with other Italian awards. The Knight's Cross is also available from Germany in certain situations.
* Multi-player and Tournament Rule options
* Evasive Maneuvers, Patrol Abort, Variable Escort Quality, Gibraltar Passage, Reassignment to Newer Submarine, Torpedo Duds, Random Historical Events, Human Torpedo (“SLC”) delivery, and much, much more!

Components:
* One ½” full-color counter sheet
* One ¾” wide full-color counter sheet for Targets
* Rules booklet with designer's notes
* Six player aid cards, 2-sided
* Five Submarine Display Mats, 2-sided
* One Submarine Patrol Map, 2-sided
* Submarine Combat Mat
* Submarine patrol logsheet
* Three 6-sided, two 10-sided dice, and one 20-sided die
* Boxed

Average Playing Time: Two-Three Hours
Players: One (with options for more players)
Replayability: Very High

      loppu varastosta
61.30 €
British Way: Counterinsurgency at the End of Empire

The British Way: Counterinsurgency at the End of Empire is the first of several COIN multipacks, containing four separate games exploring a series of thematically related insurgencies.

Between 1945 and 1960, the British fought four major “emergencies,” as they referred to their counterinsurgency campaigns, each trying to manage their retreat from empire. The four games in this pack focus on exploring British counterinsurgent responses to a variety of different opponents, including communist insurgents in Malaya, militant nationalists in Kenya, and smaller and more clandestine terrorist organizations in Palestine and Cyprus. The games adjust the core COIN mechanics to provide a compelling new way of handling two-player conflicts, while also streamlining several mechanics to quicken gameplay. The British Way offers an approachable introduction to the COIN series for new players, while presenting experienced players with four mechanically distinct games to explore and compare.

Highlights:
* Four full games in one box: Explore four different conflicts set during the twilight of the British Empire in the 1940s and 1950s. Each game uses a unique ruleset building on the same general mechanical structure, ensuring that they are easy to pick up while still offering a distinctive experience.
* A new adaptation of the classic COIN system: Improved two-player sequence of play and a versatile Political Will track for determining victory.
* Unique mechanisms reflecting the British approach to each conflict: New Villages in Malaya, the ‘Pipeline’ in Kenya, Curfews in Cyprus, and Mass Detention in Palestine.
* Small board footprint with quick-but-deep gameplay: Each game plays in under 90 minutes and takes place on a single 17x22” board.
* An “End of Empire” Campaign: A campaign scenario allowing players to play the four games in a linked series with a cumulative scoring system, random ‘external’ events relating to British decolonization, and new mechanics to integrate each game into the campaign.

Malaya
The British Emergency in Malaya (1948-1960) is viewed by some as the classic case of a successful counterinsurgency campaign, fought against an insurgency led by the Malayan Communist Party. The Malayan Emergency significantly influenced counterinsurgency theory and would become a model case, later appealed to by commanders in conflicts ranging from Vietnam to the present. The British Way: Malaya is the perfect introduction for players new to the COIN series, offering a shorter two-player game experience that will give players some familiarity with Government and Insurgent factions in other modern COIN volumes, such as Cuba Libre or A Distant Plain. For experienced players, it also serves as a good introduction to the new core mechanics in The British Way by offering Factions and Operations that will be familiar from previous COIN volumes but with several new systems, such as the Political Will track, streamlined Sequence of Play, and a shifting British Commander Capability.

Kenya
The British Emergency in Kenya (1952-1960), fought against the Mau Mau insurgents, dramatically departed from the strategy modeled in many of the modern COIN volumes, with a heavy focus on coercion rather than winning ‘hearts and minds.’ In game terms, this means a shift away from building ‘Support’ towards new mechanics modeling various forms of repression used by the British in Kenya. However, their use of repression can have political consequences back in Britain, represented as a potential penalty to Political Will—as one British official noted, “If we sin, we must sin quietly.” The British player must balance this core tradeoff, while the Mau Mau player must mobilize the Kikuyu population and expand their revolt to survive the overwhelming British response. The British Way: Kenya depicts a dramatically asymmetrical conflict where an extremely poorly equipped insurgency must utilize clever (and in some cases brutal) tactics to try and ride out an overwhelmingly powerful, often unconstrained, and increasingly criticized counterinsurgency campaign.

Cyprus and Palestine: New Counter-Terrorism Mechanics
The next two conflicts in the pack depart more significantly from core COIN concepts because Britain’s two opponents in Cyprus and Palestine operated as smaller clandestine terrorist cells rather than the larger insurgencies depicted in Malaya and Kenya. Instead, new “counter-terrorism” tactics are modeled, such as Curfews, Intelligence, Arms Caches, and a more detailed Sabotage and Terror system. These two games offer a fresh approach to a different kind of conflict and provide an even quicker play experience for two-player COIN duels.

The British Emergency in Cyprus (1955-1959) was conducted under the shadow of international opinion and increasing pressure from the international community to respect human rights. As the British player tries to balance locking down the population while managing international pressure, the EOKA player will launch sabotage attacks in towns across the island while building their organization in the mountains. The British Way: Cyprus is probably the simplest of the four games in the pack, although the new counter-terrorism mechanics it introduces are significantly different from anything that has appeared in previous COIN volumes.

Likewise, during the Palestine campaign (1945-1947), the British player will be faced with the Jewish resistance groups Irgun and Lehi launching sabotage and terrorist attacks across Mandatory Palestine, while risking criticism from the US and other international observers if their response is too heavy-handed. The British Way: Palestine further develops the new counter-terrorism mechanics introduced in Cyprus, while also including unique game systems to model the British use of the blunt tool of Mass Detention, the shifting cooperation of Haganah (the Jewish Agency’s armed wing), and high-profile terrorist attacks such as the King David Hotel bombing.

A Note on “The British Way” of Counterinsurgency:
The historical simulations included in The British Way are designed to depict the full array of strategies used by the British during these conflicts, ranging from the more benevolent provision of material benefits through pacification programs to the horrific measures used to gain control over the local population. Many myths have arisen about an ‘enlightened’ British approach to counterinsurgency that emphasized the use of minimum force and focused on winning the population’s “hearts and minds,” compared with the supposedly more violent approaches taken by the United States in Vietnam or by France in Algeria. However, new scholarship on these conflicts has confirmed the brutality of the methods commonly used by the British in their counterinsurgency campaigns. As summarized by the historian Hew Strachan, these conflicts were often decided by “the firm smack of government,” not the popular winning of hearts and minds. This multipack is intended to help synthesize and present these crucial developments in our understanding of British counterinsurgency, even if that means the simulations depicted are at times more thought-provoking than fun. The designer’s main goal is that players find these games informative about what happened during each conflict and why, and that the gameplay leaves them wanting to learn more. Each game will come with a detailed Background booklet describing the events depicted and listing additional sources, while the combined Playbook will include comparative essays discussing British counterinsurgency across the four games and how it is depicted in conflict simulations.

Game components
* Two double-sided 17x22” mounted game boards
* 4 Game Event Decks and 1 Campaign Event Deck
* 54 Wooden Pieces
* 8 Pawns
* One full-color counter sheet
* Eleven double-sided player aids
* Two 6-sided dice
* 4 Combined Rule/Background Booklets
* 1 Combined Playbook/Campaign Guide

Number of players: 2

GAME DESIGN: Stephen Rangazas
DEVELOPER: Joe Dewhurst

      heti saatavilla
102.70 €
Churchill
Churchill

By late 1942 the Axis had been stopped at Stalingrad, El Alamein, and Guadalcanal. With Axis expansion halted and Allied victory only a matter of time and resources Churchill, Roosevelt, and Stalin began to focus on how to shape the ensuing peace to their advantage. Churchill is a game about the inter-Allied conflicts that occurred over the Conference table as each side vies to control the Allied agenda and the course of things to come.

The players in the game take on the roles of Churchill, Roosevelt, or Stalin as they maneuver against each over the course of six Conferences that determine who will lead the Allied forces, where those forces will be deployed, and how the Axis will be defeated. The player whose forces collectively have greater control over the surrendered Axis powers will win the peace and the game.

Churchill is a three player game of Coop-etiion where the players must cooperate to win World War II, while at the same time achieving a superior post war position over your allies. If the players collectively fail to defeat the Axis the Allies lose, but if the Axis are defeated, there is a victor of the peace that follows. There is also a two player and solo variant.

Churchill is NOT a wargame, but a political conflict of cooperation and competition. While the game focuses on 10 of the historical conferences from 1943 till the end of the war these and much of this design should not be taken literally. Before and after each conference small groups of advisors and senior officials moved between the Allied capitals making the deals that drove the post war peace. Each conference sees one of a group of issues nominated for inclusion in the conference. The issues categories are: Theater leadership changes, directed offensives, production priorities, clandestine operations, political activity, and strategic warfare (A-bomb). Each of the historical conference cards independently puts some number of issues such as directed offensives or production priorities metaphorically put on the table, while the players nominate an additional 7 issues.

The game display for this is a circular conference table that the three players sit around behind their 'seat'. Each player has a staff deck of named personages, such as Secretary Stimson and Anthony Eden that are randomly drawn to make your conference hand. A pre-conference round of cards gives leverage to the winner who then moves an issue toward their side of the table equal to the value of the card played. Play then proceeds with the conference where each player in turn plays a card on one of the issues in the center of the conference table moving it the value of the card toward his side of the table. Each card is an historical personage and they often have bonuses if played on a particular category of issue. Contesting an issue has you move an issue away from an Ally toward your own.

At all times each player has his Head of State card (Roosevelt, Churchill, or Stalin) that can weigh in on any issue once per conference by discarding another card. Each use of your personage has a bonus and a potential penalty. Each time Roosevelt is used he may die and be replaced by Harry Truman. Churchill can have a heart attack and miss the next conference, while Stalin's paranoia may cause a mini-purge and reduce his sides effectiveness for the remainder of the conference. The net result of the conference play is players will 'win' various' issues with the player who won the most issues gaining leverage in one of the bilateral global issues (UK versus USSR global issue is Free Europe versus Spheres of Influence).

The game then moves into a post conference phase where players implement the issues that they now control. These actions impact three basic game functions: clandestine cells, political activity, and military offensives. Clandestine cells have players try to establish partisan networks in conquered countries and colonies. Using a very simple mechanic of place a network or remove an opponents network the historical ferment that occurred in Yugoslavia, France and across the world is simply simulated. A country or colony can only have one dominant side's network at any given time and during political activity players can emplace friendly governments in exile that can be subsequently undermined and replaced if the supporting networks are later neutralized by one of your allies.

Once this has all been sorted out the military portion of the game keeps the score. There is a separate display that abstractly represents the major theaters of war, Western, Eastern, Mediterranean, Arctic (Murmansk convoys and Scandinavia), CBI, SW Pacific, Central Pacific, and Far East. Each of these tracks has a Allied front for which I am looking for some kind of 3D tank piece that advance toward Germany, Italy, and Japan. Using a very simple combat mechanic each front tries to advance with Axis reserves deploying to oppose the various fronts. A successful offensive advances the front one space, although with overwhelming superiority a two space breakthrough is possible. Naval operations are simply handled by requiring a defined level of support to advance into an amphibious entry space such as France (D-Day). When a front enters Germany, Italy or Japan they surrender shutting down military operations although clandestine and political activity continue until the end of the game. In the background is the development of the A-bomb and Soviet efforts to steal its secrets. If the A-bomb is available Japan can be forced to surrender sans a direct invasion.

If at the end of Potsdam conference Germany, Italy, and Japan have not surrendered the Allies as represented by the players collectively lose the game. If the Axis have been defeated then tthe winner is the player with the most Cold War points portioned out for governments and networks aligned to your side, global issues, and a list of conditional situations. For example colonies with no network or political authority give Churchill points for keeping colonialism alive or which fronts caused axis surrender.

An important feature of the design is it can be played by zero to three players. The Churchill, Roosevelt, and Stalin ‘Bot logic akin to Volko’s COIN series allows you to always have the ability to play Churchill whether you have a full crew or you just want to watch the ‘Bots beat each other up in zero player mode.

As I stated this is not a wargame, but a three player excursion into power politics. The game takes around 3 hours to finish, and it includes a short (Tolstoy: 3 conferences), a medium (D-Day: 5 conferences) and the long (10 conferences). All scenarios end with Potsdam, but you will be able to start later in the war if you only have 1 or 2 hours to play.

Do you have what it takes to shape the Post War world in your own image? Play Churchill and find out.

Components:
* One mounted map
* Three decks of playing cards (67 cards)
* Conference Deck: 10 cards
* Three colors of tokens and wood (Allies)
* 10 black cubes (Axis)
* Deluxe counter sheet
* Full Color Rulebook
* Three play aid cards
* 11x17 Play aid
* 2x 6 sided dice
* 1x 10 sided die

  !   tilattava tuote
122.20 €
Clash of Sovereigns: The War of the Austrian Succession, 1740-48

December 1740: Young King Frederick II leads the army of upstart Prussia in a surprise invasion of Austrian Silesia. He hopes for an easy conquest of the rich province at a time when the Austrian Empire appears vulnerable following the death of Charles VI, King of Austria and Holy Roman Emperor. But despite internal opposition to the ‘Pragmatic Sanction’ that allowed a woman to inherit the throne, Austria’s new Queen, Maria Theresa, is cowed neither by Frederick, nor by France’s scheme to place a Bavarian puppet candidate on the throne of the Holy Roman Empire, nor by Spanish designs on Austria’s holdings in Italy. Amid these conflicting dynastic ambitions, Frederick’s local territorial coup proves to be only the opening act in a major European war that none of the great powers had anticipated - but all wished to profit from. It would ultimately span eight years and half the globe.

Clash of Sovereigns (COS), GMT’s 2-4 player card-driven game of the War of the Austrian Succession, has been 9 years in the making. It is a free-wheeling, faster-playing, stream-lined “nephew” of the widely-regarded Clash of Monarchs (COM).

Features:
* A 12-hour campaign game and three shorter scenarios covering 2-3 years apiece that can be played to completion in as little as three hours!
* 2-4 players.
* The French, Prussians/Spanish (“Pr/Span”), Austrians, and British/ Piedmontese (“Br/Pied”) each have their own separate card decks divided into Early, Middle, and Late war periods
* Half a dozen minor powers add their own blood and diplomatic wrinkles to the tableau – and can sometimes reshape it utterly by switching sides.
* Leaders are rated for Initiative, Offense and Defense modifiers, and Action Points.
* Distinctive national tactics and troop quality factors are ‘captured’ by Army Battle Ratings (which evolve over time) and event and Battle Tactics cards.
* A simple, but significant, naval sub-game simulates naval operations in the Mediterranean and Atlantic, including the annual Bourbon Treasure Fleet’s risky voyage home.
* Colonial conflicts in Canada and India are simulated by event cards
* Design-for-Effect economic factors are “baked into” the event and reinforcement cards and can therefore be resolved in only a small fraction of the time required by COM’s more complex economic model.

The Bourbon (French, Spanish, Prussian) and Pragmatic (Austrian, British) alliances battle across central Europe from Paris to Konigsberg and Naples to London. Each year is divided into five ‘seasons’ (Late Winter, Spring, Summer, Fall, and Early Winter). Play moves quickly since major campaigning is restricted to the Summer and Fall, and each power will typically activate only 1-3 forces per season. Certain event cards allow limited campaigning in the Early and Late Winter seasons as well. Each card has a Campaign Point (CP) value, which may be expended to activate Leaders and the armies they command, to perform Administrative Marches, and to conduct raids with irregular Croat/Hussar light troops (Austrian player only). Each leader has an Activation Point (AP) rating, which allows him to move, fight battles, and conduct sieges. This system produces historically valid outcomes and a rich narrative while keeping the pace of play brisk.

COS features asymmetrical armies with distinctive national characteristics and capabilities that have banded together in alliances that often struggle with conflicting goals. Both the Bourbons and Pragmatics will benefit – or suffer from – interactions among the various nations in their respective alliances.

The French player controls the largest, best-led army on the continent but is constrained by its limited logistical reach, King Louis XV’s quirks and maladies, court intrigue, and periodic pressure from his Spanish ally. The French will welcome the Pr/Span player’s powerful Prussian army lancing into the Austrian heartland in early/mid game but chafe under Spanish demands for cooperation and campaigning in Italy – the only place the Spanish can hope to gain the VPs necessary for victory.

The Pr/Span player is both blessed and cursed. In Prussia, he has a powerful army, Frederick’s excellent generalship, and clear objectives. Yet the politically naive Frederick can be “played” into neutrality - or out of the war completely – by wily Austrian diplomacy. Spain itself has an excellent but undersized army that so depends upon French support that the French player decides when Spanish forces will be activated for the Pr/Span player to campaign with! In order to win, the Pr/Span player needs either a Decisive Prussian victory (rare) or for both Prussia and Spain to achieve lesser levels of victory. Thus, the Prussian “frere” of 1740-1745 may become a great nuisance in 1745-1748!

The Pragmatic allies must weather the early war storms of 1740-1742, get their feet under them, and somehow gain traction to push back their powerful French and Prussian foes. They are equal to the task. The Austrian army has solid leaders and its unique Croat/Hussar light troops, which devastated enemy supply lines throughout the war, leaving French and Prussian commanders bewildered and their armies starving. Maria Theresa’s army can prevail against the French and Prussians - if it’s robustly financed to achieve maximum strength. For this, the Austrian player must rely upon the good will and immense financial resources of the Br/Pied player.

The Br/Pied player has the most subtle, difficult – and most important – role in the game. He has a high-quality British/allied army, but it is small, led by indifferent leaders, and can generally be augmented only by low-quality Dutch troops since Austria will have its hands full fighting elsewhere. Yet this mediocre, polyglot army is often the primary protector of the VP-rich Austrian Netherlands against the mighty French Marshal De Saxe! The British player must also selflessly prop up his allies by playing subsidy (reinforcement) cards, which are essential for Austria’s survival and ability to launch counteroffensives in the mid and late war periods. But the British player has a powerful fleet and, if he (literally) plays his cards right, can use it to cut off France from its overseas resources, starving it of reinforcements in the critical late war years.

The British player also controls the Kingdom of Piedmont and can win the game only if it too achieves some level of victory. Piedmont occupies a central position in Northern Italy that sits astride the routes running to the VP-rich areas in Naples and southern France and is itself the chief region where the Pr/Span player can harvest VPs. The Austrians can accomplish little in Italy without the Pieds' help, and vice versa – though they both covet the same Victory Point objectives! So if the Austrian player wants all those subsidy cards played, he may have to help Piedmont achieve its VP objectives, send more Austrian troops to defend the Netherlands, and share late war opportunities to grab VP spaces on the French-Germany border with the British.

COS’s replay value is high because the multiplicity of belligerents and theaters of operation ensure that the game will never play the same way twice. Vienna may fall to the Prussians or French; Paris and Naples may see Austrian white uniforms in their streets; and London may be beset by Bonnie Prince Charlie – or invading French troops. Will the French get Bavarian Charles VII onto the throne of the Holy Roman Empire? Will Marshal Traun and Austrian Croats take it back? Will Louis XV and George II clash in Flanders? And will anyone be able to stop De Saxe? -- Find out!

Components:
* One 22" x 34" mapsheet
* 150 Strategy cards
* 10 Day of Battle Cards
* 350 10/16-inch counters
* 120 1/2-inch markers
* Four 8-1/2" x 11" Player Aid cards
* Four 5-1/2" x 8-1/2" Power Mats
* One 24-page Rule Book
* One 20-page Play Book
* Two six-sided dice

Designer: Bob Kalinowksi
Developer: Kevin Boylan

      heti saatavilla
89.70 €
Combat Commander: Europe

Combat Commander is a card-driven board game series covering tactical infantry combat in the European and North African Theaters of World War II. One player takes the role of the Axis (Germany in this first game; Italy & the Axis Minors in later installments) while another player commands the Allies (Russia & America here; Britain, France & the Allied Minors in future expansions).

This first game of Combat Commander will include units, cards, and historical scenarios depicting the American, German, and Russian forces. The second game in the series will provide cards, counters, and historical scenarios for British, French, and Italian forces.

Each game will include 6-12 historical scenarios as well as a "roll your own" scenario system that provides an almost unending variety of map configurations, force structures, and combat situations. Replayability value for Combat Commander is very high.

A game of Combat Commander has no strict sequence of play. Each turn is divided into a variable number of Player Turns, each of which may consist of either: the active player expending one or more Fate cards from their hand for their Actions; or passing, which allows the discarding of one or more Fate cards. Players redraw up to their maximum hand size at the end of each of their own Player Turns. Additionally, Reactions may be played by either player at any time, so long as the prerequisite listed is met.

FATE CARDS: Players will take turns playing one or more “Fate” cards from their hands in order to activate their units on the mapboard for various military functions. Each nationality has its own 72-card Fate deck highlighting its historical strengths and weaknesses (lots of Smoke for the US; marksmanship bonuses for Britain; commissar events for the Soviets; broken Italian units will surrender more often; etc.). Each Fate card contains one Action and one Reaction: only one of which may be declared when the card is played. The bottom portion of each Fate card contains an Event, a random hex symbol, and a 2d6 die roll – these can never be ‘played’ from the hand, only ‘revealed’ from the top of the draw pile when a game situation instructs a player to do so.

ACTIONS include: Fire, Move, Advance, Rally, Rout, Artillery Request and Artillery Denied. Each nationality also has a varying number of Command Confusion Actions which act as duds while in hand – these cards are useless except for any possible Reaction on the card. Actions, when played, generally activate a single unit to perform that Action, unless a Leader is activated: in which case it can further activate any or all non-leaders within its Command Radius to perform the same Action. There are 15 different REACTIONS. For example:
* Sustained Fire – Add +2 when firing a Mortar or Machine Gun. If the fire roll is “doubles”, break it.
* Smoke – If a unit with boxed Movement is activated to Move or Advance, place Smoke in or adjacent to its hex.
* Grenades – Add +2 when firing at an adjacent hex.
* Dig In – Place foxholes in a friendly hex.

There are 36 different EVENTS – both good and bad – that will occur at random intervals to add much chaos and uncertainty to each player’s perfect plan. Event examples:
* Walking Wounded – Select one eliminated unit. Return that unit to play in a random hex, broken.
* Hero – If not already in play, place the Hero in a friendly hex. Rally one broken unit there.
* Reinforcements - Roll on the Support Table. Select one available unit then place it along your map edge.
* Battle Harden - One unit becomes Veteran.

Units and weapons are rated for their Firepower and Range, while units also have a Movement allowance and a Morale number. Most importantly, Leaders have a Command number as well. Command has two functions in Combat Commander. First, it allows a leader that has been activated to perform an Action the ability to further activate any friendly non-leaders up to X hexes away, where X is its Command number (or “Command Radius”). Second, a leader’s Command number is added directly to every stat on every non-leader currently occupying the same hex. So, for example, a 5-FP, 5-Rg, 5-Mv Squad with 7-Morale in the same hex as a Leader with a Command of 2 would have stats of 7-7-7 and 9 for all purposes as long as that condition existed.

Average playing time is about 90 minutes per scenario. A scenario is played on one of several mapsheets, each with a 10x15 hexgrid depicting various terrain at a scale of 100 feet per hex. In addition to playing one of the many pre-generated scenarios included with the game, players can roll up random situations, as well. Playtesters described both types of scenarios as “fast, furious, and addictive.”

Replayability for Combat Commander is high. Our core group of four testers has logged over 230 roll-your-own scenarios and still ask to play on most game nights. And with unlimited possibilities as far as additional scenarios, maps, units, weapons, variants, etc. that can be released in the months and years to come (as well as the new games covering the British, French, Italians, and the Pacific Theater now in the design stage), Combat Commander is one of those rare exceptional values in wargaming – one that can be revisited time and time again, each with a new tale to tell.

Components:
* 632 counters (5/8” and 1/2”)
* 216 2.5 x 3.5 cards
* 6 2-sided 17 x 22 maps
* 4 2-sided player aid cards
* 1 Track Display
* 1 24-page Rulebook
* 1 Playbook

Designed by Chad Jensen

      loppu varastosta
102.70 €
Commands & Colors EPIC Napoleonics

EPIC Napoleonics is the sixth expansion for GMT’s Commands & Colors Napoleonics game system. EPIC Napoleonics allows for fighting larger battles with more units. EPIC Napoleonics is actually two game systems in one – the Epic Battles system, and the La Grande Battles system. Although the scope of our Napoleonic game has changed size wise, the historical feel and the basic rules of play, for the most part, remain the same. To experience the maximum enjoyment with these two new Napoleonic game formats, both EPIC Napoleonics and La Grande Battles scenarios are best played using the Command card and Tactician card decks that were part of the Generals, Marshals and Tacticians expansion.

Included in this expansion are six standard sized scenarios that focus on key phases of the battle of Austerlitz, 2 December 1805. This expansion also features 12 EPIC sized engagements and two La Grande Battle scenarios. Also included are two double-sided mounted maps. The EPIC sided battlefield is larger, and at 11 hexes deep by 20 hexes wide, it is almost double the size of the standard size battlefield of 9 hexes deep by 13 hexes wide. When laid side-by-side to form the La Grande battlefield, the battle area is a whopping 11 hexes deep by 26 hexes wide.

EPIC Napoleonics
Knowing that it is not always easy to muster eight players, the EPIC Napoleonic game is set up to play very well by just two players. Or if players so desire, the EPIC game, can in fact, be expanded to include four and even six players.

In an EPIC Napoleonics game, one player on each side assumes the role of the Commander In Chief (CIC). Each CIC has a hand of Command cards and on a turn must play one card from his hand to order units in one section of the EPIC battlefield. Also on the turn, the CIC must select one card from the Courier rack to play. The card selected from the Courier rack will also order units in one section of the EPIC battlefield. There are only three sections in the EPIC battlefield (left, center and right) and with two Command cards played each turn, the action quickly becomes very fast and furious.

The Courier rack is a new game mechanic, and starts each battle with five Command cards that are visible to both players. Each turn one card is taken from the rack, so the choice of cards a player has each turn is reduced, until there are only two cards remaining on the rack. The rack is then filled back to five cards before the next player’s turn, and the card selection process from the Courier rack will start again.

EPIC Napoleonic will allow two or more players to enjoy a truly Epic size battle, but it is important to note in order to play most EPIC Napoleonic scenarios, players will need a copy of the Commands & Colors Napoleonic game and its expansions (Spanish, Russian, Austrian, Prussian and Generals, Marshals and Tacticians) This EPIC Napoleonic expansion will only provide enough units and terrain to fill any gaps.

La Grande Battles
Normally a La Grande Battle game is best played with eight players. Four players will take command on each side. One player, on each side, will again assume the role of the CIC. The other three players will each take on the role of a Corps field commander. Each Corps field commander will command two sections (2 left or 2 center or 2 right) of the six sections that make up the La Grande Battles battlefield. In a La Grande Battles game, each CIC has a hand of Command cards and on a turn must give one card from his hand to one of his Corps commanders. Also on the turn, the CIC must select one card from the Courier rack and give it to one of his Corps commanders. Command cards must be given to the proper Corps commander. Section cards, that state left, must be given to the left Corps commander, center section cards to the center Corps commander and right section cards to the right Corps commander. While tactic Command cards (Command cards with text and no section illustration) can be given to any Corps commanders.

In a La Grande Battles game, each Corps field commander also has his own hand of Command cards. During a turn when the Corps commander does not receive a Command card from the CIC, he may choose to play one of his Command cards from his hand. In addition, if the Corps commander does not like the Command card given to him by the CIC, he can discard it and instead play one of the Command cards he has from his hand.

Taking a closer look of how a Corps field commander will play a command card. Command cards that are received from his CIC, will order units across both of the two sections the Corps commander player commands. While a Command card that a Corps commander plays from his hand, has some additional restrictions. Each Corps commander has two sections under his command. When looking at the two sections, one section is on his left and one section is on the right and he does not have a center. A left section Command card played from the Corps commander’s hand is therefore played in his left section and a right section Command card must be played in his right section. A center section card may be played in either his left or right section and a tactic Command card (Command cards with text and no section illustration) will order units across both of the two sections the Corps commander commands.

As for La Grande Battles, it is not the intention of GMT or myself, to require a player to buy multiple copies of the Napoleonic game to play a La Grande Battles scenario. I would truly hope, that two friends, both who own copies of the Napoleonic game and expansions could come together with their games, and set up a La Grande Battles scenario to share in the fun with eight friends.

The focus of this expansion is therefore on EPIC Napoleonics to allow more players to keep enjoying the Commands & Colors Napoleonics game, while the La Grande Battles rules and scenarios are provided for players as an extra-added bonus.

Welcome to some EPIC fun!

Contents:
* 1 Rule and Scenarios Booklet
* 6 double-sided EPIC Scenario sheets (12 EPIC Scenarios)
* 1 double-sided La Grande Scenario Sheets (2 La Grande Scenarios)
* 2 Battlefield map boards
When the map boards are set up side-by-side, they form an EPIC size battlefield of 11 hexes deep by 20 hexes wide. The reverse side forms the La Grande battlefield of 11 hexes deep by 26 hexes wide.
* 3 Terrain Card Sheets
• 33 double-sided Terrain Tiles
• 54 Victory Banners
• 12 Garrison Markers
• 12 Square Counters (two counters for each Nation, with “Square 5” and “Square 6” on counters)
* 8 Battle Dice and Labels
* Over 150 Unit Blocks and Label sheets

Standard Size Scenarios:
* Austerlitz (Sokolintz & Teinitz) - 2 December 1805
* Austerlitz (10AM Davout Attack) - 2 December 1805
* Austerlitz (Soult's Center Assault) - 2 December 1805
* Austerlitz (Lannes & Murat) - 2 December 1805
* Austerlitz (Russian Guard Attack) - 2 December 1805
* Austerlitz (Soult's Attack South) - 2 December 1805

EPIC Battle Scenarios
* Austerlitz - 2 December 1805
* Vimero - 21 August 1808
* Eggmühl - 22 April 1809
* Aspern-Essling - 21 May 1809
* Raab - 14 June 1809
* Talavera - 28 July 1809
* Bussaco - 27 September 1810
* Salamanca - 22 July 1812
* Sorauren - 28 July 1813
* Möckern - 16 October 1813
* Orthez - 27 February 1814
* Laon - 9 March 1814

La Grande Battle Scenarios
* Austerlitz - 2 December 1805
* Vimero - 21 August 1808

(In order to play many of the scenarios in this expansion, the basic game or earlier expansions,, you will need a copy of the Commands & Colors Napoleonic game and the Spanish, Russian, Austrian and Prussian expansions.)

  !   tilattava tuote
97.20 €
Commands & Colors Medieval

Commands & Colors: Medieval is based on the highly successful Commands & Colors game system and by design is not overly complex. The Medieval game introduces many new game concepts to the Commands & Colors system, which add historical depth and flavor.

Some of the new concepts are:
* Superior armor and status when battling
* Cavalry units increase to 4 blocks
* Heavy infantry battle dice are reduced from 5 dice down to 4
* Light Bow Cavalry units can employ the Parthian Shot when they evade

Still, some Commands & Colors game mechanics remain familiar to players of other games in the system, like the deck of Medieval Command cards that drive movement while creating a “fog of war,” and the battle dice that will resolve combat quickly and efficiently. The stylized battlefield scenario maps emphasize the important terrain features and highlight the historical deployment of forces in scale with the game system. The scale of the game is flexible, and varies from battle to battle. For some scenarios, a unit may represent a Chiliarchy of soldiers, while in other scenarios a unit may represent just a few brave warriors. The battlefield tactics, however, that you will need to execute to gain victory conform remarkably well to the strengths and limitations of the various medieval unit types, their weapons, the terrain, and history.

The medieval battles showcased in the scenario book focus on the historical confrontations between the Byzantine Empire and Sassanid Persians (530 to 627 AD) with a slight detour to battle the Moors and their rebel allies (645 - 648 AD). The Byzantine Empire during this period of medieval history was one of constant transition and reorganization. Its army tended to mirror its eastern adversaries by deploying an increasing number of armored cavalry formations (Cataphracts) and more missile troops. Yet, it was how the Byzantines adapted their battlefield tactics in relation to the enemy it faced that is perhaps the chief reason for the longevity of their Empire.

Tentative Scenarios
* Dara - 530 AD
* Utus River - 447 AD
* Catalaunian Fields Roman Left - 451 AD
* Catalaunian Fields Roman Right - 451 AD
* First Thannuris - 528 AD
* Satala - 53 AD
* Callinicum Phase 1 - 531 AD
* Callinicum Phase 2 - 531 AD
* Ad Decimum Phase 1 - 531 AD
* Ad Decimum Phase 2 - 531 AD
* Ad Decimum Final Phase - 531 AD
* Tricamarum - 533 AD
* Lazic War: Petra Mountains - 548 AD
* Lazic War: Phasis River - 549 AD
* Lazic War: River Hippis - 550 AD
* Lazic War: Onoguris - 555 AD
* Solachon: Main Battle - 586 AD
* Solachon: Kardarigan's Stand - 586 AD
* And More...

Although the Byzantine army fought on other frontiers, against a multitude of opponents, Visigoths, Vandals, Ostrogoths, Franks, Alemanni, those conflicts are beyond the scope and space of this one package. Additional expansion modules that address those battles will be forthcoming.

Components:
* 1 Medieval Core Rule Book and 14 medieval battle scenarios
* 1 Oversize Mounted Battlefield game board (11 hexes deep by 13 hexes wide)
* 4 Sheets containing 56 double-sided Terrain Tiles, Victory Banners & markers
* 60 Medieval Command cards (new card deck)
* 8 Battle dice
* 2 Reference Cards
* 5 Block and Dice Label sheets
* 320 Plus Blocks (blocks are similar in size to C&C Ancients)

Game Design: Richard Borg

  !   tilattava tuote
117.00 €
Commands & Colors Napoleonics

The Napoleonic historical period has always been one of our favorites and was actually the second historical game that we developed using the Commands & Colors system. The Wars of Napoleon rules at first glance may seem more complex than other Commands & Colors games, but if you are familiar with the game system, you are only a few short steps away from taking Command. Even if you have never played before, learning the fundamentals of the game system is straightforward and will be an enjoyable endeavor.

For the game group in Orlando, Wars of Napoleon is one of our favorites. There is a wealth of subtle and bold features that set it apart from other historical periods and it truly embraces the tactical doctrines of France and the various nations that fought against Napoleon.

* The Napoleonic period showcases a unique balance between the roles of Infantry, Cavalry and Artillery on the battlefield.
* In combat, a unit's battle strength is directly tied to the number of blocks present in the unit. Therefore, as a unit suffers block loses its combat effectiveness is reduced.
* An Infantry unit, by forming square, can reduce the effectiveness of the most gallant Cavalry charge.
* Artillery in combined arms combat along with an Infantry or Cavalry melee attack can produce the most devastating results.
* As with other Commands & Colors games, the battle dice resolve combat quickly and the Command cards provide a fog of war and will present players with new challenges and opportunities for victory.
* When in Command, the battlefield tactics you will need to execute conform remarkably well to the historical advantages and limitations inherent to each Napoleonic Army. For example, as the French Commander you will want to maneuver your infantry units into a position to take advantage of their melee attack dice bonus. While a British Commander will want his line infantry to take up a defensive position and stand and volley fire with a dice bonus. The other major powers also have similar seemingly simple advantages that can impact a battle and will influence your Command style for that army.

The core Wars of Napoleon game will feature French, British and Portuguese troops, while the expansions will showcase one Coalition army that opposed Napoleon.

Core Game Contents
* 1 Mounted Battlefield Gameboard
* 4 Sheets containing 56 double-sided Terrain Tiles and 2 Infantry in Square tracks
* 70 Command cards
* 8 Battle dice
* French, British and Portuguese Blocks and Label sheets
* 3 National Unit Reference Cards
* 1 Rule Book
* 1 Scenario Booklet containing 15 battle scenarios

      loppu varastosta
117.00 €
Commands & Colors Napoleonics Expansion: Generals, Marshals and Tacticians

Generals Marshals Tacticians is the fifth expansion for GMT’s Commands & Colors Napoleonics game system. In my opinion, this expansion will impact your Commands & Colors Napoleonic gaming like no other expansion has done to date.

In this expansion, there are 18 historical battles. A number of these scenarios focus on the engagements of the French army of 1813 against the Russian, Austrian and Prussian armies around Leipzig. Players will also find a few new units including, Russian Lt Lancer Cavalry and Militia Lancer Cavalry, British Rocket Battery, and French Guard Horse Artillery.

But what makes this expansion stand out is the introduction of a deck of Napoleonic Tactician cards. These 50 cards are designed to spice up each and every player’s Napoleonic experience by enhancing the role of leaders on the battlefield, without adding additional complexity or pages of rules. Tactician cards also add an element of suspense and will challenge players to coordinate their use in a timely manner. In terms of game play, they represent leader actions and Napoleonic battlefield happenings or unit abilities. These cards may hinder the opposition army, enhance a player’s units or may instantly change the course of a battle. The number of Tactician cards each player will take at the start of a battle is indicated in the scenario notes. For earlier scenarios, players must refer to the Commander Tactician Rating Reference Card, which is a comprehensive listing of all Commands & Colors Napoleonic scenarios released to date with a commander’s tactician rating for each army.

The Tactician cards along with the updated deck of Napoleonic Command cards, will add an exciting new command level to all Napoleonic scenarios. The new deck of 90 Command cards has not gone through any major changes. For the most part, players will be very familiar with the Command cards. Updates to the deck mainly focus on how the Command cards work in conjunction with the new deck of Tactician cards. However, the deck does include six new “Take Command” cards.

A couple of new game mechanics are also introduced in this expansion including, Garrison Markers, rules for forming and battling with a Grand Battery and an update to the Leader Casualty Check rules, where a leader alone in a hex may now be targeted in ranged combat.

Welcome to some enhanced fun!

Scenarios
* Sahaga - 21 December 1808 (British vs French cavalry action)
* Sorauren (French left) - 28 July 1813 (British vs French)
* Sorauren (French right) - 28 July 1813 (British vs French)
* Gohrde - 18 September 1813 (Coalition Allies vs French)
* Wartenburg - 3 October 1813 (Prussian vs French)
* Dohna - 9 October 1813 (Russian vs French)
* Leipzig - Liebertwolkwitz (morning) - 14 October 1813 (Russian, Prussian vs French)
* Leipzig - Liebertwolkwitz (afternoon) - 14 October 1813 (Russian, Prussian, Austrian vs French)
* Leipzig - Möckern (French left) - 16 October 1813 (Prussian vs French)
* Leipzig - Möckern (French right) - 16 October 1813 (Russian vs French)
* Leipzig - Lindenau - 16 October 1813 (Austrian vs French & Allies)
* Leipzig - Gohlis - 17 October 1813 (Prussian vs French & Allies)
* Brienne - 29 January 1814 (Russian vs French)
* Chateau-Thierry - 12 February 1814 (Prussian vs French)
* Vauchamps - 14 February 1814 (Prussian, Russian vs French)
* Orthez (British Attack Left) - 27 February 1814 (British vs French)
* Orthez (British Attack Right) - 27 February 1814 (British vs French)
* Hougoumont - 18 June 1815 (British vs French)

(In order to play many of the scenarios in this expansion, the basic game or earlier expansions,, you will need a copy of the Commands & Colors Napoleonic game and the Spanish, Russian, Austrian and Prussian expansions.)

Components:
* Deck of 90 Command cards
* Deck of 50 Tactician cards
* Expansion Rules and Scenario booklet
* Two Tactician Commander Scenario Rating Reference cards
* Two Terrain Effects cards
* 1 card Sheet containing:
* 11 double-sided Terrain Tiles
* 8 Garrison Markers (double-sided French and Allied Coalition)
* 18 Victory Banner Counters ( 3 each French, British, Spanish, Russian, Austrian and Prussian)
* 1 sheet of Block Labels
* Over 70 blocks

Game Design: Richard Borg

      heti saatavilla
91.00 €
Commands & Colors Napoleonics Expansion: Prussian Army

The Prussian Army is a Coalition expansion for Commands & Colors Napoleonics (a copy of which is required to play).

During the Seven Years’ War, small Prussia under Frederick the Great defeated the armies of Austria, Russia, and France to increase the size of its territories two fold and become a major power in Europe. But in spite of Prussia’s reputation as a formidable fighting nation, Prussia withdrew from the First Coalition as an active opponent of the French Revolution and remain on the sidelines until the Fourth Coalition in 1806.

In 1806, the Prussian Infantry were products of a system that had not altered since the Seven Years' War. The cavalry although probably the best mounted in Europe thanks to the East Prussian horse studs, were scattered amongst the army divisions at Jena, and were committed in numerous uncoordinated attacks. In general, the lack of coordination of the arms in combat was one of the major causes of the Prussian defeat at Jena.

In the words of Napoleon...
"At Jena, the Prussian army performed the finest and most spectacular maneuvers, but I soon put a stop to this tomfoolery and taught them that to fight and to execute dazzling maneuvers and wear splendid uniforms were very different matters."
- Napoleon

In 1806 Napoleon crushed the fearsome Prussian military machine. The humiliation of military defeat and being forced to cede much of its territories forced the Prussian king, Frederick William III, into much-needed military reform. The new Prussian army that emerged became one of the finest in Europe., due in part to the organizational genius of Scharnhorst and Gneisenau and in part due to Field-Marshal Prince Blücher, who drove his regiments to fight with relentless vigor. In 1813 Prussia rejoined the war against Napoleonic France and the Prussian army under Blücher, although sometimes playing second fiddle to Austria, Russia and Great Britain, was a major force in bringing an end to Napoleon Bonaparte's rule.

In 1815 Napoleon returned to meet the English and Prussians, which would lead to his Waterloo. Prussia’s reward in 1815 at the Congress of Vienna was the recovery of her lost territories, as well as the whole of the Rhineland and Westphalia and other territories. Prussia therefore emerged from the Napoleonic Wars as the dominant power in Germany.

In this expansion you will find 18 historical scenarios that focus on the Prussian Army battles from 1806 to 1815 against Napoleon, plus all the new units you’ll need to field for these engagements.

Battles

1806
* Schleiz - 9 October 1806
* Saalfeld - 10 October 1806
* Jena - 14 October 1806
* Auerstädt - 14 October 1806
* Greussen - 16 October 1806
* Halle (Morning & Afternoon) - 17 October 1806
* Altenzaum - 26 October 1806
* Zehdenick - 26 October 1806
* Prenzlau - 28 October 1806
* Waren-Nossentin - 1 November 1806
* Lubeck - 6 November 1806

1813
* Blankenfeld - 23 August 1813
* Grossbeeren - 23 August 1813
* Dennewitz - 6 September 1813

1814
* Laon (French Right) - 9 March 1814
* Laon (French Left) - 9 March 1814

1815
* Ligny - 16 June 1815
* Plancenoit - 18 June 1815
* Wavre - 18 June 1815

COMPONENTS
* 1 Scenario Booklet featuring 20 historical scenarios plus Expansion Rules
* 2 National Unit Reference Cards
* 4 Block Label sheets
* 1 Terrain Tile Sheet - contains 15 double-sided Terrain Tiles
* 1 Square and Counter sheet
* 131 Wood Blocks: 23 French blue & 108 Prussian gray
* 78 Wood Blocks: 39 French blue & 39 Prussian gray
* 36 Wood Blocks: 9 French blue & 27 Prussian gray
* 1 double-sided Terrain Effects Chart Card

DESIGNER: Richard Borg
ART DIRECTOR: Rodger B. MacGowan
UNIT ART: Pascal da Silva
MAP TILES: Mark Simonitch
PRODUCERS: Rodger B. MacGowan, Andy Lewis, Tony Curtis, Gene Billingsley, & Mark Simonitch

  !   tilattava tuote
97.50 €
Commands & Colors Napoleonics Expansion: Russian Army

The Russian Army is a Coalition expansion for Commands & Colors Napoleonics.

Russia, was ruled until 1796 by Catherine the Great. It would then suffer under "Mad" Tsar Paul I, until his assassination in 1801, which brought his son Alexander I to the throne. Alexander, in command of a Russian army that was as vast as the territory from which it was drawn, did his best by various treaties and alliances to counter the increasing power of France under Napoleon without going to war.

The Russian army at the time of Napoleonic wars still had many characteristics of Peter the Great’s regime; senior officers were largely recruited from aristocratic circles, and the Russian soldier was regularly beaten and punished to instill discipline. Furthermore, many lower-level officers were poorly trained. Yet the Russians involved in hostilities with its neighbors - Sweden, Poland, Turkey and Austria - were capable of astonishing feats and total, blind obedience to orders.

In 1805 Britain and Russia signed an alliance against France. In 1806, Prussia joined the Coalition and Prussia and Russia mobilized for a fresh campaign. After Napoleon’s humiliation of Prussia at Jena, the French Emperor turned his attention to subduing his Russian foe and marched into Poland. After a series of sanguinary battles, the French drove Russian forces out of Poland back to Mother Russia and created a new Duchy of Warsaw.

In 1812, the Russo-French treaty gradually became strained, as the requirement of joining France's Continental Blockade against Great Britain was a serious disruption of Russian commerce. Bonaparte decided to bring the Russians back into line in June, and invaded Russia hoping to inflict a major defeat on the Russians and force Alexander to sue for peace. The invasion of Russia and the retreat of the French army, as many historians point out, proved to be the turning point in the Napoleonic Wars.

In 1813 Russia opened the campaign against Napoleon joined by Prussia and Austria, and during the three-day battle of Leipzig, Bonaparte's fate was sealed.

In this expansion you will find 18 historical scenarios that focus on the Russian Army battles from 1806 to 1814 against Napoleon, plus all the new units you’ll need to field for these engagements.

Battles:

1806
Czarnowo - 23/24 December 1806
Pultusk - 26 December 1806
Golymin - 26 December 1806

1807
Eylau - 8 February 1807
Friedland - 14 June 1807
Heilsberg - 10 June 1807

1812
Borodino (Shevardino Redoubt) - 5 September 1812
Borodino (Borodino Village) - 7 September 1812
Borodino (Great Redoubt) - 7 September 1812
Borodino (Utitza) - 7 September 1812
Polotsk - 18 October 1812
Krasnoi - 17 November 1812
Crossing the Beresina - 28 November 1812

1813
Leipzig (Wachau) 16 October 1813

1814
Champaubert - 10 February 1814
Montmirail - 11 February 1814
Craonne - 7 March 1814

Components:
• 2" spine box
• 24 page Russian Expansion Rule & Scenario Booklet with 14 historical scenarios
• 2 Russian National Unit Reference Cards
• 2 Abbreviated Unit Reference Cards
• Over 200 Blocks
• Block Label sheets
• 1 Terrain Tile Sheet - contains 15 double sided Terrain Tiles
• 1 Russian Square track and Counter sheet

  !   tilattava tuote
97.50 €
Commands & Colors Napoleonics Expansion: Spanish Army

The Spanish Army is the first expansion for Commands & Colors: Napoleonics.

At the time of the Napoleonic Wars, Spain was only a shadow of its former power. Spanish troops and leaders, as many Napoleonic historians point out, performed badly on a large number of occasions. Yet there are a number of battles, Bailen, Tamames, Alcaniz and San Marcial where the Spaniards fought valiantly and gained victory. Ironically, the point most historians overlook is the fact that the Spanish armies constituted a threat that the French simply could not ignore. As good as Wellington’s Anglo-Portuguese field army was, that army faced multiple French armies. They could only defeat one French army at a time. The Spanish Armies and the accompanying guerrilla warfare against French troops tied down the remainder, allowing the Anglo-Portuguese army to ultimately emerge victorious.

In this expansion you will find 18 historical scenarios that focus on Peninsular battles fought by the Spanish army from 1808 to 1813, plus all the new units you’ll need to field for these engagements.

1808
Bailén - July 19 1808
Zornoza - October 31, 1808
Gamonel - November 7, 1808
Espinosa - November 11, 1808
Somosierra - November 30, 1808

1809
Medellin - March 28, 1809
Alcaniz - May 23, 1809
Maria - June 6, 1809
Talavera (Spanish Flank) - July 28, 1809
Tamames - October 13, 1809
Ocano (Cavalry Action) - November 18, 1809
Ocano - November 19, 1809
Alba de Tormes - November 28, 1809

1811
Barrosa (French Attack) - March 5, 1811
Albuera - May 16, 1811

1813
Vitoria (Hill's Attack) - June 21, 1813
San Marcial - August 31, 1813
Ordal Cross - September 13. 1813

The quality of Spanish troops varied, from very poor to good, and the Spanish National Unit Reference Card presents a wealth of subtle unit characteristics that set the Spanish Army apart from all other Coalition armies that opposed Napoleon. Command of the Spanish Army, therefore, will truly challenge even the most experienced Commands & Colors: Napoleonics player.

Components:
* One 2" spine box
* Scenario Booklet that features 18 historical scenarios plus Expansion rules.
* 2 Spanish National Unit Reference Cards
* 181 Blocks
- 95 Infantry blocks (71 Spanish - 24 French)
- 73 Cavalry blocks (39 Spanish - 34 French)
- 9 Artillery blocks (9 Spanish)
- 4 Leader blocks (4 Spanish)
* 3 Block Label sheets
* 1 Terrain Tile Sheet - contains 15 double sided Terrain Tiles
* 1 Square and Counter sheet
- 1 Spanish Infantry Square Track
- 4 Spanish Square Counters
- 9 Spanish Victory Banner counters (Spanish Flag one side, French Flag other side)
- 6 Spanish Guerrilla Action tokens

  !   tilattava tuote
97.50 €
Commands & Colors: Ancients Expansion 2 and 3

Friends, Romans and countrymen lend me your ears...

Some of you have already discovered that Commands & Colors: Ancients is much more than a game. It is an expandable game system that allows players to fight historical Ancient battles.

Imperial Rome and The Barbarians is the second expansion to Commands & Colors: Ancients. In this second expansion you will find historical battles that focus on Rome and the early Gallic invasion, invasion of the Northmen, the Servile War (Spartacus), Caesar's conquest of Gaul, the Roman Civil Wars and much more.

Showcased in the second expansion, are over 20 scenarios that range from 390 BC (Allia River) to 9 AD (Teutoburger Wald), and all the blocks and labels you need to field the Roman and Barbarian forces to fight out these battles. By now, you know we can do this, because Commands & Colors: Ancients by design is a unique historical game system that allows players to effectively portray stylized Ancient battles that play to a conclusion in less than an hour.

Imperial Rome and The Barbarians will feature at least one new unit type as well as several "specialty" units and leaders (Briton Chariots, Legionaries using the pilum, and Caesar, for example). Each of these operates within the confines of the original system rules, with only slight modifications to reflect their historical abilities and importance. So, rules-wise, if you've played Commands & Colors: Ancients, you'll have no trouble at all learning the few special rules for these new types of units.

The battle dice resolve combat quickly and the Command cards provide an element of luck that creates a fog of war and presents players with both challenges and opportunities for victory. Yet the tactics you need to execute conform remarkably well to the advantages and limitations inherent to the various Ancient units, their weapons, terrain and the history.

ALEA JACTA EST!
(The die is cast - a phrase near and dear to wargamers). Julius Caesar spoke this phrase as his legions crossed the Rubicon, sparking the Second Roman Civil War. Leading the most capable combat-hardened veteran legions in the Roman Army, Caesar set out to subdue his numerically superior opponents - and succeeded!

The Roman Civil Wars is the third expansion to Commands & Colors: Ancients. In this expansion you will find historical battles that focus not only on the most famous of the Civil Wars, but also the earlier First Civil War, and the Sertorian War in Spain where Quintus Sertorius, a gifted soldier-in-exile, defeated several larger Roman armies sent against him, until killed in 72 BC by assassins.

Expansion #2: Rome and the Barbarians has been modified from its original configuration by the addition of a mounted battle board - an item requested by many of you - and a sheet of terrain tiles containing some new terrain types and some additional original tiles. To keep the P500 cost unchanged, the 110+ blocks needed for the Roman Civil War battles have been shifted to Expansion #3 set.

Expansion #3: The Roman Civil Wars will provide all the gray and red blocks and stickers needed to field two full opposing Roman armies when combined with the gray Republican Roman army from Commands & Colors: Ancients, and the red Marian Roman army from Expansion #2: Rome and the Barbarians. There will be at least 16 scenarios that range from 82 BC (Aesis River) to the Battle of Munda in 45 BC.

The Roman Civil Wars will feature familiar units with new capabilities. The Roman legions have evolved into the deadly fighting units of legend. In terms of Commands and Colors performance, the medium infantry units (representing less experienced legions) and heavy infantry units (representing the veteran legions) will now be able to move two hexes without engaging in close combat, or still move one hex and have close combat (as well as throwing their pilum - a capability acquired in Expansion #2: Rome and the Barbarians). You will be able to fight battles with medium and heavy infantry as you have never fought them before!

Rules-wise, if you've played Commands & Colors: Ancients, you'll have no trouble at all learning the few special rules for these legionary infantry units, for the basic mechanics remain unchanged. The battle dice resolve combat quickly and the Command cards provide an element of luck that creates a fog of war and presents players with both challenges and opportunities for victory. Yet the tactics you need to execute conform remarkably well to the advantages and limitations inherent to the various Ancient units, their weapons, terrain and the history.

But that's not all... GMT is also going to include another mounted mapboard in Expansion #3, configured to be mated to the mounted board from Expansion #2. In addition the Commands & Colors: Epic Ancients new Command rules for fighting large-scale historical battles will provide those of you interested in fighting truly large-scale, multi-player, ancient battles the perfect and unique opportunity to do so with a number of your friends.

Note on Combo 2 & 3 reprint Edition:
With both of these modules out of stock and the mounted map originally included in them now available in the main C&C: Ancients game (and separately), we have decided to combine the two modules into one boxed pack and remove the mounted board to get you guys as inexpensive a reprint edition as possible. Exact components are listed below. Enjoy!

COMPONENTS:
* 3" Box
* 457 red, green, gray and black blocks
* 1 sheet terrain tiles
* 7 sheets of labels
* 2 reference cards
* 1 combined rule and scenario book

  !   tilattava tuote
78.00 €

Hakusivu: 1 2 3 4

Uutuuksia