Tuotehaku

Ruutunäkymän liikennevaloissa vihreä on heti saatavilla, punainen juuri nyt loppu varastosta, keltainen ei vielä ilmestynyt tai huutomerkin kera ei hyllyvalikoimaa, eli me tilaamme sitten, kun sinä olet tilannut meiltä. Saatavuusinfossa kerrotaan tarkemmin saatavuustiedoista.

Haun tulokset 1 - 24 / 105


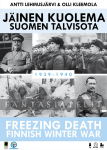
Jäinen kuolema: Suomen talvisota / Freezing Death: Finnish Winter War

Pelin viimeisimmät suomenkieliset säännöt valmistajan sivuilta.

Jäinen kuolema: Suomen talvisota on kahden pelaajan sotapeli Suomen ja Neuvostoliiton välisestä talvisodasta vuosina 1939–1940 ja tiestä tuohon konfliktiin.

Pelin lautana on kartta, johon on kuvattu kolme rintamaa, joilla pääasialliset taistelut tapahtuivat ja missä Neuvostoliiton pelaaja yrittää edetä joukkoineen kun Suomen pelaajan yksiköt, heikommin varusteltuina, mutta paremmin sopeutuneina jäätäviin lämpötiloihin yrittivät epätoivoisesti pysäyttää näitä.

Länsivaltojen alkaessa harkita interventiota, alkoi hiekka molempien osapuolten tiimalasissa käydä vähiin. Kestäisikö suomalaisten puolustus yhä raivokkaammat hyökkäykset ja toisaalta olisiko Stalin valmis maksamaan poliittisen hinnan taistelusta, joka vastoin hänen oletuksiaan ei osoittautunutkaan paraatimarssiksi Helsinkiin.

Peli on korttivetoinen ja pelimekaniikan sydämen muodostavat yli 50 toimintakorttia (joista jokaisessa on kuva konfliktin ajalta). Kortteja voi käyttää joko tapahtumina tai toimintapisteinä. Tapahtumiin kuuluvat niin vodka-annoksen rohkaisemat neuvostojoukot, maailman ensimmäisen naisdiplomaatin madame Kollontain diplomaattiset manööverit, kuin Suomen USA:ssa ennen sotaa hankkima sympatia ainoana maana, joka maksoi velkansa.

Peli on täysin kaksikielinen (suomi ja englanti), ja siinä on toimintakortit kummallekin kielelle.

Sisältö:
* Pelilauta
* 74 pelinappulaa
* 55 korttia englanniksi ja 55 korttia suomeksi
* Sääntökirja englanniksi ja suomeksi
* Tohtori Olli Kleemolan laatima 6 sivuinen historiallinen johdatus sotaan suomeksi ja englanniksi
* Kahdeksan kuusisivuista noppaa

Freezing death: Finnish Winter War is a two player wargame of the Winter War fought between Finland and Soviet Union 1939-1940 as well as preparations that lead to the conflict.

Map shows three fronts where main battles took place and where soviet player tries to advance his troops to while Finnish players units, underequipped but more accustomed to freezing conditions, try desperately stop them. While the Western Powers deliberated intervention, time was running out on both belligerents. Can the Finnish defenses endure the ever-fiercer attacks? Is Stalin ready to pay the political price of a battle that, contrary to his scheme, was not about to become a parading march to Helsinki?

Game is card-driven and more than 50 action cards (each with unique picture of the era) are at the heart of the game. Cards can be used either as action points or events. Events include Russian troops encouraged by vodka-rations, diplomatic efforts of worlds first female diplomat madame Kollontai as well as sympathy Finland has built is US on prewar years by being only nations not to default its debts.

Game is fully bi-lingual (English and Finnish) including two decks of action cards. So if you wish to familiarize yourself to wargaming lingo in Finnish this is a perfect opportunity.

2 Players
60–90 Min
Age: 12+

      heti saatavilla
59.00 €
Conquest and Consequence

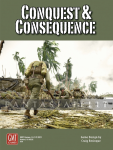
Conquest and Consequence brings the Triumph and Tragedy system to the Pacific/East Asia theater during the same 1936-1945 time period. Like T&T, it is designed for 3 players, maintaining the 3-sided dynamic that adds so much variety and intrigue to the system.

Militarist Japan, the first Asian power to modernize, seeks to replace the European colonial empires in East Asia with a true “all-Asian” empire, with itself as the natural leader. The Communist Soviet faction comprises the Siberian USSR and the Red Chinese revolutionaries. The Capitalist USA faction consists of the United States, the British Empire, and the struggling regime of Nationalist China.

The game begins in 1936 with the Militarists in control of Japan and expansion on the agenda. Its [war] industry is well developed, but it is weak in population and particularly resources. Its battle-hardened army has easily overrun resource-rich Manchuria, and a weak China awaits.

Japan (like Germany in T&T) has the early initiative due to its well-prepared military. Will it:
* Move south into China?
* Take the “Northern Road” into resource-rich east Siberia (as favored by the army)?
* Pursue the “Southern Road” to the oil-rich Dutch East Indies advocated by its navy?
* Or bide its time, seeking a better position via diplomatic arrangements with neutrals including independent Chinese warlord states?

Japanese aggression in China will likely irritate the sleeping giant that is the USA, but it is far away across the wide Pacific, and Japan has special naval abilities that allow it to compete at sea.

The Red Chinese have just completed their Long March and re-established their base in inland Shaansi, far from areas of Japanese (or Capitalist) interest. The Red Chinese are very weak militarily but have a secret weapon: Partisans. These are non-military “political” organizations (represented on-map with cardboard counters) that are difficult to eradicate, multiply if ignored, and can be converted into military units when desired (this being ill-advised without sufficient concentration). The Soviet Union, also acutely aware of Japanese expansionism, is desperately fortifying eastern Siberia, which is otherwise thinly defended.

Nationalist China is aware of the Japanese threat but must also deal with the internal Communist threat. The United States is disarmed, disinterested, and distracted by the Great Depression. The British Empire is woefully under-defended and overconfident. The USA alliance must build up its economy while somehow improving the military capabilities of the British Empire, Nationalist China, and itself.

The game combines the Pacific naval war and the land war in Asia (including the Chinese Civil War), both equally weighing upon victory. The naval war is dramatic, featuring short, decisive battles and expanded roles for airpower and island bases. In the tradition of Triumph and Tragedy, the 3-sided aspect features negotiation, diplomacy, and subterfuge within a multitude of strategic possibilities. Like T&T, the game allows players freedom to diverge from the inclinations and policies of the historical actors and plays in 4-6 hours of constant tension and involvement.

COMPONENTS:
* 22”x 34” Mounted mapboard
* 228 wooden blocks
* 2 label sheets (sticky labels)
* 2 5/8” counter sheets
* 55 Action cards
* 55 Investment cards
* 28-page Rulebook
* 32-page Playbook
* 3 Player Aid cards (2-sided cardstock)
* 1 pad of Game Record sheets
* 4 6-sided dice

DESIGNER: Craig Besinque
DEVELOPER: Simon McDonald
ART: Charlie Kibler and Carlos Olivares
PRODUCTION COORDINATOR: Tony Curtis
PRODUCERS: Andy Lewis, Rodger MacGowan, Gene Billingsley, Mark Simonitch, Tony Curtis

      heti saatavilla
162.50 €
Down in Flames Squadron Pack 2: Bombers

Following on the heels of the first Squadron Pack for the Down in Flames series of WWII air combat card games comes Squadron Pack 2: Bombers. While the first pack contained new fighters, this one adds more Light Bombers and Formation aircraft to the system.

The pack will include such famous aircraft as the B-25H (complete with 75mm gun) and the Il-2m3 Shturmovik. But there will be lesser-known planes as well, like the German Hs-129B-1/R2 (a sort of WWII version of today's A-10) and the Italian CANT Z.501 Gabbiano flying boat. All the cards will be printed in the eight-per-sheet (cut 'em out yourself) style of C3i-DiF module inserts that you've enjoyed over the years.

One of the difficulties in creating a pack of bombers and patrol planes is that up until now these aircraft types have only been used in the context of a Down in Flames campaign. The rules included in the pack provide three ways around this problem. First, there are guidelines for adding Formation aircraft to basic game dogfights. Second, the pack includes a number of stand-alone generic missions into which players can simply "plug in" appropriate aircraft. Finally, we have included rules (courtesy of Roger Horky) that allow Formation aircraft to engage in a form of dogfighting (called Gunnery Duels in the game) with other Formation planes. So if you've ever wanted to fly a Short Stirling against an FW-200 Condor, now's your chance.

Squadron Pack 2's rules also contain reprints of some of the rules from Corsairs and Hellcats for the benefit of those players who don't own that game (you know who you are). In addition, there are rules for two new ground attack weapons: the German Hs 293 radio-controlled air to surface missile and Fritz X radio-controlled glide bomb.

Like the first pack, Squadron Pack 2: Bombers will contain 64 new aircraft cards printed 8 to a sheet in the same enhanced graphic style as Squadron Pack 1. The pack will also include a short (4-8 page) rulebook and an 11x17 wrap around cover decorated with Rodger MacGowan's gorgeous artwork. The inside of the cover sheet will form a play mat for use during Gunnery Duels.

Developers: Mike Lemick and Rodger B. MacGowan

      heti saatavilla
24.00 8.40 €
alin hinta 30 päivää ennen alennusta 24.00
Field Commander: Rommel Deluxe

Deluxe Edition: This edition of Rommel has the same content as our original game. The Deluxe version features mounted maps, extra thick counters, and a new taller box.

Rommel was designed by Dan Verssen and was the first game in our "Field Commander" solitaire series of historical strategy board games. You get to take command of General Erwin Rommel's forces in 3 exciting WWII campaigns: France 1940, North Africa 1941, and D-Day 1944. An easy to use game system manages the Allied movement, combat, and reinforcements.

The counters are beautifully printed and die cut with full color on both sides. The game box is 9" x 12" x 1.5". Each of the 3 MOUNTED Campaign Map pages are 11" x 17" to provide both a large playing area, and fit nicely on an average table.

As your units win battles, their stats will increase.

Each campaign comes with a list of historical options. You can select any of these options to modify the campaign, and its difficulty level. This allows each campaign to be replayed many times and never be the same twice.

The game comes with "Career" rules that allow you to link the campaigns. The outcome of one campaign affects your start-up conditions for the next campaign.

Game Time: Each campaign can be played in 2 hours.
Complexity: Low to Moderate
Players: 1
Ages: 12 and up

Components:
* 3 Full Color MOUNTED Campaign Maps (11" x 17")
* 176 Full Color EXTRA THICK 5/8" counters
* 1 6-sided die
* 1 Campaign Log Sheet
* Rulebook

      heti saatavilla
78.00 €
Fire in the Sky: the Great Pacific War 1941-1945

Simulating the Pacific Front of World War II has always been one of the great wargame design challenges. The same distance that planes could cover in a few hours took days for ships and weeks for foot soldiers. Hostile jungles and great oceans combined to make logistics and transport of paramount historical concerns. These and other design puzzles are solvable by only the most gifted designers.

Renowned Japanese wargame designer Tetsuya Nakamura has successfully met these challenges and Multi-Man Publishing is to offer the elegant result - Fire in the Sky. Fire in the Sky has, until now, only been available in Japanese.

With only one map and 180 counters, Fire in the Sky packs years of prior Pacific design attempts and experience into an effort that beautifully distills the essence of the conflict and serves as further proof that great things do indeed come in small packages. Fire in the Sky provides players with the same problems and perspectives faced by the historical combatants, yet does so in a game that can be played in 5 hours or less. The game is ingeniously balanced and so provides not only a look into the minds of the actual commanders, but also a fun, competitive and tense gaming experience.

The game includes glorious 1-inch counters, a clever map that integrates hexes and areas, and rules that cover all of the essential aspects of the Great Pacific War. Oil convoys and troop transports are as vital to victory as the massive Carrier fleets that steam over the vast Pacific. Tetsuya Nakamura’s intelligent and ingenious design also offers Western players a fascinating glimpse into the Japanese perspective on the war.

2 Players
60–300 Min
Age: 12+

      heti saatavilla
74.70 €
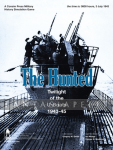
Hunted: Twilight of the U-Boats, 1943-1945

"No option but to fight on."
-Grossadmiral Karl Doenitz

the time is: 0800 hours, 3 July 1943
The Hunted is a solitaire tactical level game placing you in command of a German U-Boat during WWII. This is the long-anticipated sequel to the award-winning, multiple-print edition release The Hunters, and picks up the action where The Hunters left off. You command one of many U-Boat models available starting in 1943 and look to successfully complete U-Boat operations until the end of the war. Not only is this a standalone game, but fans of The Hunters will enjoy having the capability to easily combine both games to span all of WWII and experience the career of a U-Boat commander from 1939 until 1945.

While your mission is to destroy as much Allied shipping and as many Capital ships as possible, players will find it extremely challenging to "go the distance" and survive the entire war. The second half of the war has not been sugar coated; the brutal aspects facing U-boat commanders in the final phases of the war make surviving your attack difficult at best. True to history, your challenge is to accomplish what only a few could achieve — to make it to the conclusion, as happened historically.

The Hunted is purposely designed to deliver a brisk yet intensive gaming experience that forces many decisions upon you as you take command among the major German U-Boat models in service during WWII, and try to survive until the end of the war. All major U-Boat models are accounted for, with every level of detail, including period of service, armaments, crew make-up, damage capacity, and more. Fans of The Hunters will enjoy the same nail-biting game system, but fraught with many more challenges to withstand the advances the Allies have made in anti-submarine warfare. If you ultimately survive until 1945, you will surrender at port, having done your part on the front lines.

As U-Boat commander, you will be confronting many decisions during your patrol. To begin with, eleven German U-Boat models are profiled and available for you to choose from. Patrol zones reflect the period during the war at sea and will shift as the war progresses. All stages of the U-Boat campaign are represented; missions become increasingly more difficult as your adversary makes advances in anti-submarine warfare.

Conducting patrols are the heart of the system as you will be resolving encounters against individual ships, convoys, enemy submarines, and aircraft. Situations you face and decisions you make suddenly come in quick succession:

* Will you travel by Schnorkel with reduced visibility, or on the surface to spot more targets?
* How will you engage a convoy once spotted?
* Can you survive after attacking, and will your BOLD decoys work?
* How many torpedoes will you fire, and at what targets?
* Will you try to follow a convoy or ship to engage in additional rounds of combat?
* How will you slip away from escorts to avoid or minimize damage?
* What evasive maneuvers do you undertake?

The major German U-Boat models are represented and accurately profiled for the patrols you will undertake during the latter stages of the war:

* Type VIIC
* Type VIIC/41
* Type VIIC-Flak
* Type VIID
* Type IXC
* Type IXC/40
* Type IXD-2
* Type IXD/42
* Type XB
* Type XII (hypothetical)
* Type XIV
* Type XXI

Patrol Assignments include:
* Arctic
* Atlantic
* Australia
* Brazilian Coast
* British Isles
* Caribbean
* Indian Ocean
* Invasion (Atlantic)
* Mediterranean
* North America
* Norway
* West African Coast

The game delivers an historical narrative as 300+ ship targets are uniquely identified (including tonnage) with their historical counterparts that were sunk during the war, including freighters, tankers, and American ships.

Game System Highlights:
* 12 German U-Boat types represented
* 12 Patrol Assignments including anti-invasion patrol
* 300 named shipping targets, including 20 Capital ships
* Special Missions for Abwehr Agent Delivery, Supply Delivery, Replenish, and Minelaying
* Combat encounters with individual ships, ships with escort, convoys, enemy submarines, and aircraft
* Daytime and Night Engagement including Wolfpack patrols
* U-Boat Damage includes flooding, hull, torpedo doors, periscope, fuel tanks, crew injury (by crew type), engines, hydrophones, flak gun(s), deck gun, batteries, radio
* Crew Advancement, Commander Promotion including decorations up to the Knight's Cross and new awards including the Wound Badge, U-Boat Front Clasp, German Cross in Gold, and U-Boat War Badge
* Multi-player and Tournament Rule options (including Wolfpack Tournament)
* Evasive Maneuvers, Patrol Abort, Variable Escort Quality, Resupply at Sea, Gibraltar Passage, Reassignment to Newer U-Boat, Torpedo Duds, BOLD decoys, "Alberich" Anti-sonar coating, Schnorkel, NAXOS radar detector, Random Historical Events, and much, much more!

German technological advances abound in the second half of the war. Decoys, Schnorkels, homing torpedoes, FaT ladder search pattern torpedoes, and the Type XXI "Electroboot" have all given hope to the U-Boat crews. But balanced against these are Allied ASW advances — Hedgehog, Squid, Fido, and an ever-increasing air presence.

You were The Hunter, but now you are The Hunted. Can you bring your boat home in a tension-packed situation where every decision may be your last?

Game Components:
* One 1/2" full-color counter sheet
* One 3/4" wide full-color counter sheet
* Rules booklet with designer's notes
* Five player aid cards, 2-sided
* Six U-Boat Display Mats, 2-sided
* Two U-Boat Patrol Maps, 2-sided
* U-Boat Combat Mat
* Eight U-Boat Kommandant Cards
* U-Boat patrol logsheet
* Three 6-sided, two 10-sided dice, and one 20-sided die

Complexity: Low to Moderate
Average Playing Time: Two-Three Hours
Players: One (with options for more players)
Solitaire Suitability: Very High
Replayability: Very High

DESIGNER: Gregory M. Smith
DISPLAY & COUNTER ART: Ian Wedge
EDITOR: Jack Beckman
SPECIAL CONTRIBUTOR: Alexey Borodkin
ART DIRECTOR: Rodger B. MacGowan and RBM Studios
PRODUCER: John Kranz

      heti saatavilla
71.50 €
Lanzerath Ridge: Core Game

Rules.

The blend of easy to learn rules with rich historical accuracy makes this a perfect game for veterans and newcomers alike.

Lanzerath Ridge is a solitaire wargame that takes places on the first day of the Battle of the Bulge, during the Second World War. In the game, you take control of a small group of American soldiers. Under your command, the Americans must fend off the relentless attacks from German paratroopers and fusiliers. Your goal is to recreate the incredible historic accomplishment of the American soldiers by defending the town of Lanzerath, Belgium and delaying the advance of an entire SS Panzer Division.

Background
The American force that defended Lanzerath consisted of 18 men from an intelligence and reconnaissance platoon as well as 4 forward artillery observers. During a day-long confrontation, the Americans defended Lanzerath from about 500 German paratroopers and fusiliers. The Americans inflicted dozens of casualties and delayed the advance of Kampfgruppe Peiper, the spearhead of the German 1st SS Panzer Division. Every member of the defense was recognized for their valor, and the intelligence and reconnaissance platoon became the most decorated American unit of its size during World War II.

Valiant Defense
Lanzerath Ridge is the next design in the Valiant Defense series, following the critically acclaimed Pavlov's House, Castle Itter, and Soldiers in Postmen's Uniforms. The Valiant Defense series allows you to play amazing stories of courage, with small forces holding the line against unimaginable odds. Games in the series focus on the individual defenders and are deeply rooted in history, while providing a quick play experience with a light complexity ruleset.

Lanzerath Ridge is divided into four attack periods, each of which is represented by a deck of enemy cards.

* The first attack began at approximately 1030. This was the 9th Fallschirmjäger Regiment’s initial assault, which consisted of two platoons from the regiment’s 2nd Company charging straight up a hill at the American defenders.
* The second attack began around 1100. This attack also consisted on a straight-forward charge up the hill, though limited efforts were made to attack the defenders’ flanks.
* The third attack began around 1400. This attack was supported by extensive machine gun and mortar fire, but no efforts were made to flank the defenders.
* The final attack began at dusk. The 9th Fallschirmjäger Regiment was joined by men from the 27th Fusilier Regiment. Together they launched coordinated attacks against the defenders’ right and left flanks, eventually penetrating the lines and capturing the Americans.

Each attack period is divided into a number of turns, and each turn consists of two phases:
* In the Enemy Phase you resolve three enemy cards, which drive the enemy’s actions.
* In the Defense Phase you perform five actions with the defenders.

The game ends immediately if the defenders’ morale drops to 0 or if a German attacker takes over an American defensive position. Otherwise, the game ends after the last attack. Your level of success is based on the Americans’ morale, intelligence gained during the defense, and any objectives you accomplish.

The Creators
Lanzerath Ridge was created by David Thompson (game design) and Nils Johansson (art and graphic design). David's previous designs with DVG include Pavlov's House, Castle Itter, Soldiers in Postmen's Uniforms, For What Remains, and By Stealth and Sea. He has also designed War Chest and the Undaunted series. Nils' previous works include Maori Wars: The New Zealand Land Wars, 1845-1872, Ambon: Burning Sun & Little Seagulls, Equatorial Clash, Santander '37, A Cold and Resolute Fight: The Battle for Narvik, April-June, 1940, the Battles of the Old Northwest series, and many others.

1 Players
60–75 Min
Age: 10+

      heti saatavilla
91.00 €
Last Hundred Yards 1

The Last Hundred Yards is unlike any tactical wargame published to date. It introduces innovative systems intended to model Small Unit Behavior in Combat during WW2. It is fun, fast-paced, and provides a very good simulation of what it was like to command combat units at the platoon or company level. The game is purposely designed to deliver a brisk yet intensive gaming experience that forces many decisions upon you as you take command of an infantry company in Western Europe after the D-Day landings.

Here's a look at the major innovations and the designer's thinking behind the systems featured in the The Last Hundred Yards:

Initiative and Advantage: In The Last Hundred Yards, only the player winning the initiative has a proactive game turn; his opponent is limited to reaction only. Generally, the attacker has the initiative or momentum at the beginning of a small unit combat as the result of plans and preparation, so he generally dictates the action. The defender will generally react to the attacker's actions, hoping at some point to blunt or take away the attacker's momentum. This is represented in The Last Hundred Yards by player advantage and the importance of winning the initiative.

Simultaneous vs Sequential: In small unit combat, things are happening simultaneously. In an attack on an enemy position, some units of a formation provide cover fire to suppress the enemy, while other units maneuver against the enemy position. These actions take place simultaneously. But, in most current tactical games, opportunity fire is sequential and is typically represented by the Phasing Player moving a unit or stack of units a single hex at a time, giving the non-phasing player an opportunity to fire. Then he moves into the next hex, again giving the non-phasing player an opportunity to fire, etc. Once he has finished moving one unit or stack of units, he selects another and repeats the process until he has moved all of his units. Not only is this very time consuming, but it's often unrealistic as well. First, the phasing player can adjust his move depending on the opportunity fire result. In reality, all these things are happening at the same time. Each player’s units would be moving and firing simultaneously and may not know or see where the enemy maneuvered. In The Last Hundred Yards, simultaneous movement and opportunity fire are modeled primarily through the Action / Reaction Cycle and Fire Mechanics.

Action/Reaction Cycle: “Where there is action there is always a reaction.” In The Last Hundred Yards, the Action/Reaction Cycle is the engine and the heart of the game. The Player winning the Initiative is the active player. He conducts actions (fire, maneuver, or recover) with the units of the active platoon. After all units of the active platoon have completed their actions, units of the non-active player may react (fire, maneuver, recover or do nothing) to units of the active player if units of the active player conducted actions in their LOS. Once the non-active player completes his reactions, the active player may react in turn to those units of the non-active player that conducted actions in their LOS. Or, the active player may instead activate the next platoon, repeating the cycle. A key aspect is that unless a unit sees an enemy unit conduct an action in his LOS he may not react. In essence, units that saw no action will most likely do nothing as they were most likely to hold their position until notified otherwise.

Fire Mechanics: Fire mechanics in The Last Hundred Yards are based on the premise that during the short span of a few minutes in a game turn, fire is focused on a specific enemy unit as it fires or maneuvers. To reflect this, DRM markers are used to represent the enemy unit or units under fire and the amount of fire power placed on them. A different color DRM marker is used for each type of fire (green for small arms fire, yellow for anti-tank fire and red for indirect fire). Note that neither player will see the results of his fire until the Fire Resolution Phase occurring after all platoons of the active player have been activated. The following Fire Resolution is extremely fast and simple. The firing player rolls a single sided 10 die for each of his DRM markers in play, adding or subtracting the DRM of this DRM marker to the die roll, then comparing it to the defensive value of the enemy unit. Combat results are Disruptions or Casualty Reductions.

Tank Combat: Tank combat at this scale is the most difficult aspect of modeling small unit combat. In most tactical games, vehicle combat usually has taken the form of defensive fire or motion activity by the targeted vehicle during the “I go” player’s turn. But there are some problems with this approach. First, defensive fire suffers from the “perfect knowledge” problem. The targeted vehicle always spots the menace. Sometimes, even often, the target vehicle has no opportunity to fire at its assailant for the simple reason that the crew of the target vehicle does not know the enemy is there. One cannot see much out of a buttoned-up tank on a battlefield erupting with booming explosions and the life-threatening zip of high velocity shells. The tank that kills yours is often one that was never seen. Second, humans do not possess vision thru 360 degrees. The act of “looking all around” takes time and in that time, a projectile may be on its way to kill your vehicle. Looking right means you are not looking left for a segment of time and in that time segment death may come your way. So in The Last Hundred Yards, the traditional defensive fire concept has been replaced with a reaction sequence that might allow the target vehicle to escape its hunter, and, in some cases, turn the hunted into the hunter.

Components:
* 6 double-sided geomorphic card stock maps
* 1 full-color Rules booklet
* 1 full-color Play booklet
* 2 sheets of 9/16" counters
* 2 sheets of 3/4" counters
* 4 MIssion Cards
* 2 identical Combat/Terrain Charts
* 2 identical Player Reference Cards
* 1 Game Turn Track
* 4 10-sided Dice

      heti saatavilla
76.70 €
Last Hundred Yards 3: The Solomon Islands

The Last Hundred Yards Vol. 3: The Solomon Islands is the third game in the Last Hundred Yards Series. This game focuses on the vicious and brutal Solomons Campaign, including actions to control the islands of Guadalcanal, Bougainville, and New Georgia.

When you play the Solomon Islands Campaign missions, you will experience some of the fiercest small unit actions in the Pacific Theater. The game will focus on actions involving the 1st (The Old Breed) and 3rd (Fighting Third) Marine Divisions, as well as the Army’s 25th Infantry Division—the unit that finally drove the Japanese off the island, earning them the nickname “Tropic Lightning.”

Take to the jungles of Guadalcanal with the 1st Marine Division as they begin the first ground offensive of the war. Landed onto Guadalcanal and with intermittent naval support as the struggle for naval supremacy raged offshore, the Marines fought tooth and nail to secure their small foothold around Henderson Airfield. They fought against Japanese Reinforcements coming from all over the South Pacific area. Engage in bitter jungle fighting with the 3rd Marine Division as they attempt to hold and expand the beachhead on Bougainville Island against the Imperial Japanese 6th Infantry Division.

Finally, serve with the 25th Infantry Division’s famed 27th Regiment, the “Wolfhounds,” as they try to reduce Japanese positions on Guadalcanal’s Galloping Horse Ridge (an action that is portrayed in the movie “The Thin Red Line”). You will also fight with the Wolfhounds in the jungle around Munda Point for the airfield on New Georgia. Each of these actions involved tense jungle warfare and the routing out of fanatical Japanese units from hidden bunkers and pillboxes. You will understand the nerve-racking frustration of clearing an enemy position, only to have infiltrators attack you yet again from a different direction, at night!

This volume introduces new weapons and terrain including flamethrowers, anti-tank halftracks, light and heavy jungle. Each mission will provide new challenges with different elements, forces, and situations encountered, making this volume an exciting and nail-biting addition to The Last Hundred Yard Series.

Note: This game is a stand alone game. It does NOT require ownership of The Last Hundred Yards to be played.

Core Volumes for The Last Hundred Yards (LHY) Pacific Theater Series: The Last Hundred Yards Volume III: Solomon Islands is the core volume and will be required to play all future Pacific Theater Modules or Mission Packs.

COMPONENT LIST:
* 4 double-sided geomorphic maps (8 total)
* 4 full-size counter sheets
* 1 half-size counter sheet
* 1 full-color Rules booklet
* 1 full-color Playbook
* 5 Mission Cards (10 missions)
* 2 Combat/Terrain Charts
* 1 Game Turn Track
* 4 10-sided Dice

DESIGNER: Mike Denson
MAP ART: Liz Stephanoff
COUNTER ART: Charles Kibler, Rick Reinesch, and Dariusz Buraczewski
PRODUCTION COORDINATOR: Tony Curtis
PRODUCERS: Mark Simonitch, Tony Curtis, Andy Lewis, Rodger MacGowan, Gene Billingsley

      heti saatavilla
78.00 €
Last Hundred Yards: Mission Pack #1

The Last Hundred Yards Mission Pack #1 builds on Volumes I and II focused on the Allied campaigns in Western Europe. The Pack contains ten Missions that occurred in 1944 during the Normandy pre-breakout and breakout phases in July/August, the Hurtgen forest in November, and the Battle of the Bulge in December.

Join the 2nd Division’s 23rd infantry regiment and experience what Allied soldiers termed “Hedgerow Hell” as it drives through “Purple Heart Draw” to take Hill 192 against the 3rd FJ regiment. The overall goal was to cut the St. Lo-Bayeux highway, a task that was critical for protecting the east flank of the 3rd Army’s breakout from Normandy along the west coast.

Follow units of Patton’s 3rd Army’s breakout that ultimately encircled the German 7th Army and led to its destruction in the Falaise Pocket. These Missions range from crossing key water barriers, forming bridgeheads, and seizing key crossroads to eliminating fortified positions.

Finally, see if you can do better with outnumbered Allied troops who were tasked with taking or holding, what seemed to them, pointless objectives during the Hurtgen Forest and the opening stages of the Battle of the Bulge campaigns.

This volume introduces new weapons and terrain including Rhino tanks, hedgerows, and sunken roads. Each mission provides challenges with different elements, forces, and situations, making this volume an exciting addition to The Last Hundred Yards Series.

Note: Players will need both LHY Volumes I and II to play all the Missions in this Mission Pack

COMPONENTS:
* Two double-sided geomorphic maps
* Five Mission Cards (10 missions)
* Mission Pack Special Rules

      heti saatavilla
23.40 €
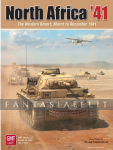
North Africa '41: The Western Desert, March to December 1941

North Africa '41 is a game that represents the campaign in North Africa from Rommel's first offensive in March 1941 to December 1941. Combat units represent regiments, brigades, and battalions. Each game turn represents half a month, but a game turn is further divided into 3 Impulses representing 4-5 days.

This is a complete redo of my old design The Legend Begins which was first published 30 years ago by Rhino Game Company. Everything has been redone—new map, new order of battle research, and improved rules using many of the ideas developed in Stalingrad ’43, Holland ’44, and Salerno ’43.

The map and unit scale from the old game remains the same as well as some of the rules.

Scene from a VASSAL game of the early May 1941 game turn, 3rd Impulse. Some movement allowance on counters have since changed.

There are still Limited and Active ZOCs, Tank shifts, Coastal Shipping between ports, Malta convoy rules, port destruction/repair, and Resource Points. Resource Points are used to build or purchase assets that are in limited supply such as: air support, battleship convoy escort, air transport, and temporary full participation of the Italian army.

The basic game system borrows heavily from other games in the WWII 19xx series, but there are no ZOC Bonds in this game. Only the ZOCs of motorized units stop enemy movement. Units can move past non-motorized units by paying +2 MPs to exit each ZOC.

New rules have been added to enhance excitement and prevent perfect plans: Event Tables, Delay markers, strafing, Rommel movement bonus, and the Long Range Desert Group.

The game will include three scenarios: The Campaign Game, Battle Axe, and Crusader.

CONTENTS:
* One 22” x 34” map sheet and one 22” x 28” map sheet
* Two counter sheets
* One Rules booklet
* Two identical 17” x 11” player aid cards
* Three Setup and Scenario cards
* Two 6-sided dice

Game Designer: Mark Simonitch

      heti saatavilla
84.50 €
Panzer Basic Game
Panzer Basic Game

The Panzers Roll...

The tanks prepare for action. The fuel tanks topped off and the ammo loaded. The commanders confer one final time to review the battle plan. They await your orders.

As the fog clears, your beleaguered battle group once again moves into position to cover the retreating infantry. It is their only possible escape route. Failure is not an option – it never is. Your ranks have thinned since your first days on the Eastern Front. Those once halcyon times have now come and gone. The objective is simple. It is just a matter of holding the line until the reinforcements arrive.

The sharp report of a tank gun to your right quickly focuses your attention back to the situation at hand. The enemy is quickly advancing. You order the flank element to engage, all the while keeping a sharp eye peeled to the left thinking this is just another diversionary feint.

Again, your suspicions are correct. Their main force just broke over the rise on your left. You order the main body forward. The engines rumble, the guns crack and explosions erupt. Your forces will once more carry the day!

Panzer Major Points:
* Game system designed for small unit actions from platoon to battalion-sized formations
* Vehicles, towed guns and aircraft are scaled at 1:1 with each 7/8” double-sided counter representing a single unit
* The 5/8” double-sided leg unit counters are scaled at squads, half-squads and sections, including their attached weapons
* Ground scale is 100 meters per hex
* Comprehensive yet quick to play
* Basic set includes a 22” x 34” mapboard
* Expansion sets include multiple double-sided geomorphic mapboards
* Full color illustrated manual with various player aids and reference cards
* Modular rules system with Basic, Advanced and Optional rules section. Players may keep it simple or as complex as desired.
* All of the unit data is included on the full-color data cards.
* The streamlined chit-based command system moves the action along at a brisk pace
* Scenario and TO&E Reference Book
* The add-on modules expand the game from the basic set.

Includes rules for:
* Vehicle include 11 unique hit locations, armor angles and penetration charts for level, rising and falling fire
* Various ammunition type, e.g., AP, HVAP, APCR, HEAT, HE
* Sighting Effects
* Overwatch fire
* Rate-of-fire
* Indirect fire, both on gameboard and off gameboard
* Hand-to-hand combat
* Close assault
* Troop quality
* Command control
* Unit cohesion
* Morale
* Smoke Effects
* Mines
* Obstruction
* Bogging
* Air-to-ground and anti-aircraft combat

Covers the major theaters of WWII including the:
* Eastern Front
* Western Front
* North Africa

Panzer Basic Game Components:

Counters:
* 88 – double-sided 7/8” (1 sheet)
Vehicles
Towed-guns
Aircraft

352 – double-sided 5/8” (2 sheets)
Infantry
Order Chits
Reference
Status/Damage
Terrain Effects, e.g., mines, rubble
Turrets, open and buttoned-up

* 1 – 22” x 34” single-sided full color map

* Reference Charts
2 – double-sided 11” x 17” Game Charts
2 – single-sided 8 ½” x 11” Transport/Summary/Hidden Unit Charts
2 – double-sided 8 ½” x 11” Data Card Keys
1 – double-sided 8 ½” x 11” Terrain Chart/Sequence of Play Chart

* Data Cards 5” x 4”
German: 8 double-sided
PzKpfw III/M
PzKpfw IV/G
PzKpfw IV/H
PzKpfw V Panther
PzKpfw VI/E Tiger I
PzKpfw VI/B Tiger II
Marder II
STuG III/G
SPW 251/1
Trucks, SdKfz 7 and SdKfz 11 Prime Movers
7.5cm PaK 40 Anti-Tank Gun
8.8cm FlaK 38 Anti-Air/Tank Gun
Hs 129B-1/R2 and Fw 190 F-1 Aircraft
Artillery
Squads, Half-Squads & Sections
Mortars, HMG and Anti-Tank Weapons

Soviet: 8 double-sided
T-70 M42
T-34/76 M43
T-34/85 M44
KV-1S M42
IS-2m M44
SU-76M
SU-85 M43
SU-100 M44
SU-152 M43
Trucks and Limbers
57mm M43 Anti-Tank Gun
76.2mm M39 Anti-Tank Gun
IL-2m3 Shturmovik and Yak-9T Aircraft
Artillery
Squads, Half-Squads & Sections
Mortars, HMG and Anti-Tank Weapons

* Booklets 8 ½” x 11”
Rulebook: 80 pages
Playbook: 40 pages

* Dice
4 – d10 (2 white, 1 Blue, 1 Red)

Game Design: James M. Day

      heti saatavilla
110.50 €
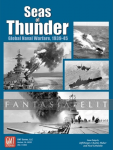
Seas of Thunder: Global Naval Warfare, 1939-45

World War 2 was the largest and most violent extended naval war in history. From September 1939 until the surrender of Japan, the high seas were a global battle zone filled with mighty battleships, nimble cruisers, silent hunters, and flat-tops bristling with planes. Before our eyes, we witnessed the changing of warfare on the high seas as the thunderous old guard fell to air power and submarines Raiders prowled the open waters and the carrier showed its true diversity and adaptability.

Seas of Thunder not only allows players to re-create the Atlantic or Pacific theaters of the war but to see how challenging the entire picture was for their leaders. How do you protect a globe from German raiders? How desperate was it for Britain when France fell and they were left to fight Germany and Italy alone on the high seas? What is the right balance for the Soviet fleet split between for distinct fronts (Baltic, Black Sea, Arctic, and Pacific)? If the Mediterranean force weakens for the allies, where to they draw ships. from? Does Japan strike quickly or play for attrition when they arrive on the halfway point? Will America fight in two fronts, three, or four?

In Seas of Thunder, players will experience the tension of too much sea to cover with too few ships, the frustration of being caught unprepared, or the intensity of a vital stand contesting a high-value sea area. Victory is neither sudden nor guaranteed. In each battle, a flight of Catalinas, the lack of ASW, the improper distribution of air power, or even a missing minesweeper could be the difference between success or failure.

Seas of Thunder is every bit a full-force strategic-level representation of the conflict on the high seas during World War 2. Players have to manage a global disposition of their warships with frequently too much ocean to cover and not nearly enough ships to cover it.

Each nation has access to the historical ships that sailed in the conflict. Each country's fleets have advantages and disadvantages that are unique to them.

Germany: Small surface fleet but complemented with an ever-expanding force of Submarines. Reliance on Armed Merchant Raiders that can strike all over the globe. Additionally their use of Neutral ports allows them great flexibility in setting up their plans and forcing the Allies to respect the entire battlefield.

Great Britain: Superior warships in quantity but not as new as the German Fleet in general. All of the ships operationally tied to a global network of bases. Care and forethought is required at the start of each game regarding their deployment , as re-deployment will be challenging.

France: Quality Ships that will be bounced from side-to-side over the course of a game. Their disadvantage is moving first and opening themselves up to being savaged each time they leave port.

Italy: Has strong ships and local superiority in the Mediterranean. A lack of wartime building means that Italian losses are not replenished at the rate the Allies are, so each loss feels more permanent and damaging.

Soviet Union: Respectable ships and submarines are countered by the fact that they are forced into restrictive fights on three or four fronts (Baltic Sea, Arctic Ocean, Black Sea, and Pacific Ocean). Each of these fights are usually balanced agains the Russians, but they must at least threaten on all of them to alleviate pressure on the other Allies.

Japan: Begins the war with a huge fleet of varying and unique ships. They are easily a match at first for any opponents. As the war progresses, the USA and UK begin to rise up and challenge them for dominance. The Japanese player has to understand their limits and not over-reach with what feels like unstoppable power.

USA: Starts off the game with plenty of ships and plenty of holes to fill. The Pacific is brutal with Japan processing so much power. But the Mediterranean needs shored up, not to mention the Atlantic war against the U-boats. "Over-reach" will be the watchword for the day as the American commander. As the game progresses, the power shifts in your favor, as do the responsibilities.

Objectives and Scoring
At its heart, Seas of Thunder is a large area control game where the Allies score low numbers of points for control and the Axis score higher per area. Controlling 6 Areas for the Allies may not be as valuable as scoring 1 area for the Axis. The Axis player seeks to win key zones, and the Allied player must make them pay dearly for them.

The game is divided up into 7 smaller scenarios or campaigns that can be played '"as-is" or combined to fight a portion of the war all they way up to the entire campaign.

Points are scored each turn for the following:
* Variable points per Sea Zone controlled
* Each Convoy of the opponent Sunk
* Each Enemy Warship Sunk
* Each Land-Based Air Unit not used (and thus allowed to participate in the ground war or strategic bombing)

Historical Authenticity
Ok, you know me, so of course we had to make a couple of adjustments to the historical realities to make the game the best competition between two sides. Most of this was done with just adjusting the scoring to keep scenarios balanced. In addition, we tweaked the time periods to allow for a more precise entry and removal of powers at the start and end of scenarios.

The French and Vichy were a difficult choice but we allowed them to perhaps more flexibility than they historically executed. Players can keep them in port, preserve them, and score their points when they flip first to Axis, then back to the Allies. Or they can use them above and beyond what they historically did. We have also elected to keep the Free French ships out of the game and "interred" while the Vichy are active to avoid confusion.

We will be publishing a number of InsideGMT articles with all of our historical vs gameplay decisions mapped out, some may already be listed above when you read this.

Various Strategies
What we really tried to do in Seas of Thunder is to allow players to have multiple levers to control and manipulate

Base Deployment is important and cannot be overlooked. Placement of your ships at the start of the game is of crucial importance. Some nations are more difficult to handle than others, and the British are perhaps the most tied to their starting locations.

Operational Disposition becomes key on both sides. The sides going first must keep forces strong enough to contest sea zones but not so powerful that the strength becomes wasteful. The latter moving side, usually the Axis, must pick and choose where to appear in strength, where to raid, and where to avoid.

Individual ship functions need to be balanced and are the key to winning every battle. A mass of battleships becomes vulnerable to submarines and air. Submarines are vulnerable to carriers and destroyers but only if they are on ASW patrol. Carriers have quick-strike opportunities but become floating targets if their strikes fail. Minelayers are the scourge of the sea for everyone, unless, of course, you have the otherwise useless minesweepers with you. You can call it a rock-paper-scissors approach if you like, but if you are a short piece of paper, you may get smashed by a rock.

Seas of Thunder is the first game I have played that truly lets me understand the tightrope walked by both sides in the war. How gloriously open the war seemed but how restricted it truly was. Chuck, Neal, and I feel that we have given players the perfect opportunity to compete against each other in a game that truly reflects the challenges faced by the commanders. We have had great fun testing it for three straight years, and we hope you have the same enjoyment playing it.

What's in the Box
* Seas of Thunder may not have every ship in the conflict, but it has the ones you know.
* 1 Mounted Map (Double-Sided with pre-Pearl Harbor scoring on one side and post-Pearl Harbor scoring on the other)
* 1200+ Combat Ship counters (Capital ships down to Destroyer Squadrons, Submarine Grops, and Mine-sweeping Flotillas)
* 132 Convoy & Utility counters
* 14 Port Cards (1 per side for each of 7 scenarios)
* Combat Sequence Cards for tracking combat
* Plus sundry dice, rules, scenario details... the usual.

Game Design: Jeff Horger, Charles Maher, and Neal Cebulskie
      heti saatavilla
84.50 €
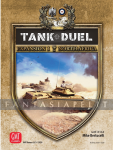
Tank Duel: Expansion I -North Africa

Tank Duel Expansion #1: North Africa takes the popular Tank Duel system to the desert!

North Africa introduces new desert terrain and rules for dust, deep sand, armored cars, heat and haze, and more. British and Italian tanks join the fight, alongside even more German AFVs:

Cruiser Mk. IV
Crusader Mk. II
M3 Grant
Matilda Mk. IV
Sherman Mk. III
Valentine Mk. II
Valentine Mk. III
M13/40
Semovente da 75/18
Marder II
Panzer III H
Panzer IV E
Panzer IV F/2
Sd. Kfz. 232 8-rad

Tank Duel: North Africa includes ID Counters allowing you to assign any ID Number to each tank, enabling players to combine the tank boards from multiple Tank Duel sets in order to create new tank matchups, or have 4 Tigers mix it up! North Africa also comes with brand new scenarios, including new historical scenarios for you to test your crews. Tanks and terrain from North Africa can be combined with some scenarios from Enemy in the Crosshairs to give you even more ways to play Tank Duel!

North Africa supports the popular Robata system from Enemy in the Crosshairs and will have new Robata compatible scenarios, and additional rules for Robata to handle desert terrain and new AFVs. From Egypt to Morocco, Tank Duel Expansion #1: North Africa allows you to experience the sun, heat, sand and grit of World War II like never before!

Note: This Tank Duel Expansion is not a standalone game and requires ownership of Tank Duel: Enemy in the Crosshairs in order to be played.

COMPONENTS:
* 103 Playing Cards
* 16 Double-sided Tank Boards
* 1-1/2 Full Color Countersheets
* Combined Rules & Playbook

DESIGNER: Mike Bertucelli
DEVELOPER: Jason Carr and Joe Aguayo
ART: Terry Leeds
PRODUCTION COORDINATOR: Tony Curtis
PRODUCERS: Andy Lewis, Tony Curtis, Mark Simonitch, & Gene Billingsley

      heti saatavilla
91.00 €

Hakusivu: 1 2 3 4 5

Uutuuksia